Author Archives: zxl123

Copy boot files to other partitions

As the name implies, boot files load Windows to boot, and they are always saved in a hidden system reserved partition (if users install Windows on a partitioned hard disk, system reserved partition will be contained in drive C). Once boot files are missed or damaged, our system will be unbootable. Therefore, it is very necessary to make a backup for these files. Well then, how to copy boot files to other partitions? Next, we will show users a good solution.


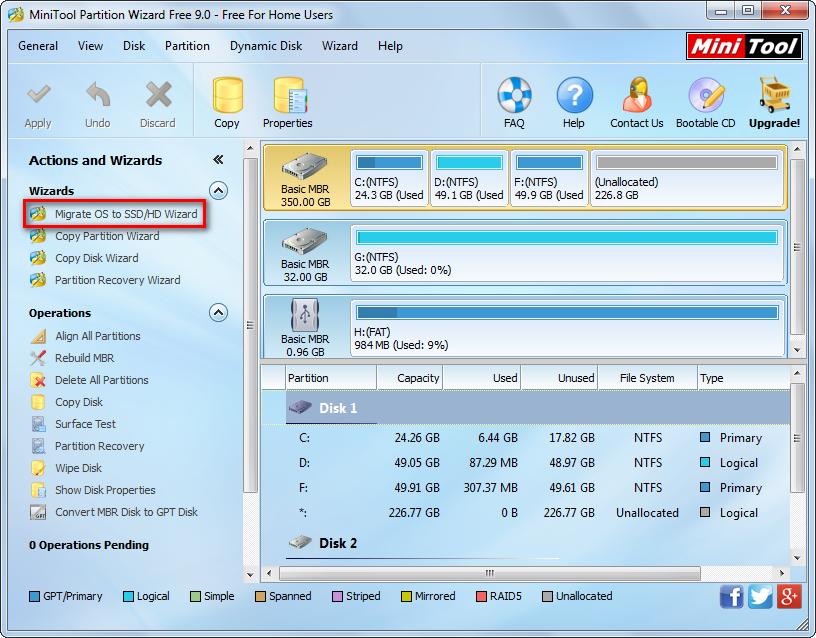
Since a hidden partition can not be seen in Windows Explorer, users will be unable to open it to copy boot files. Instead, they can clone the entire system reserved partition to other partitions for all boot files will be copied at the same time. Nowadays, there is free drive clone software to do this kind of operations, and MiniTool Drive Copy is a good choice. Note: it is free for Windows home users only and can not be used on Windows server. For server support, MiniTool Partition Wizard Server Edition is a good choice.


MiniTool Drive Copy is able to clone a single partition as well as the entire hard disk, so it is a good tool to migrate Windows from one disk to another disk, backup important partition, and upgrade old small disk to new large one. Only several steps are required.


Copy Boot Files to Other Partitions with MiniTool Drive Copy


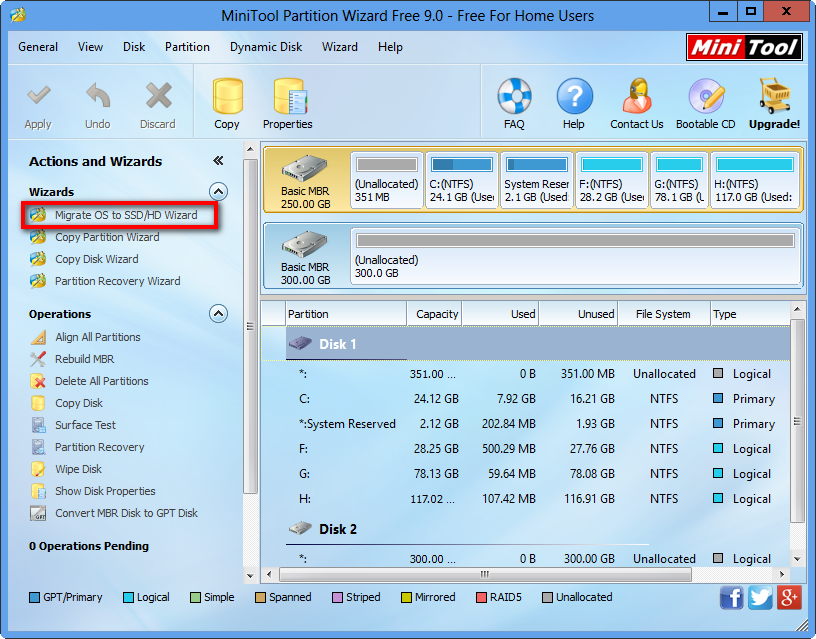
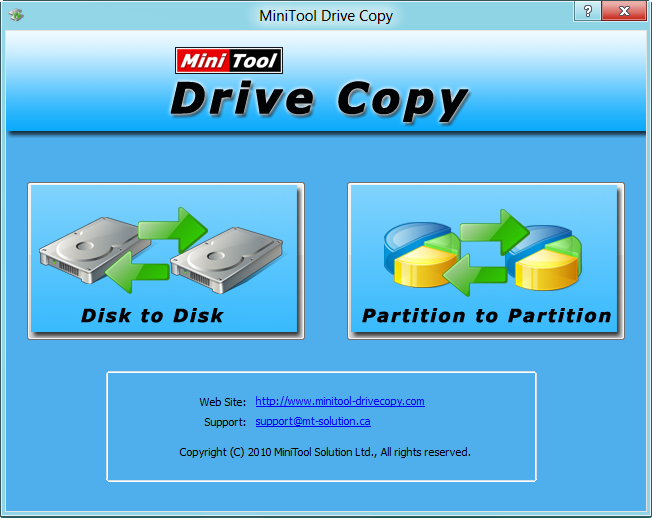
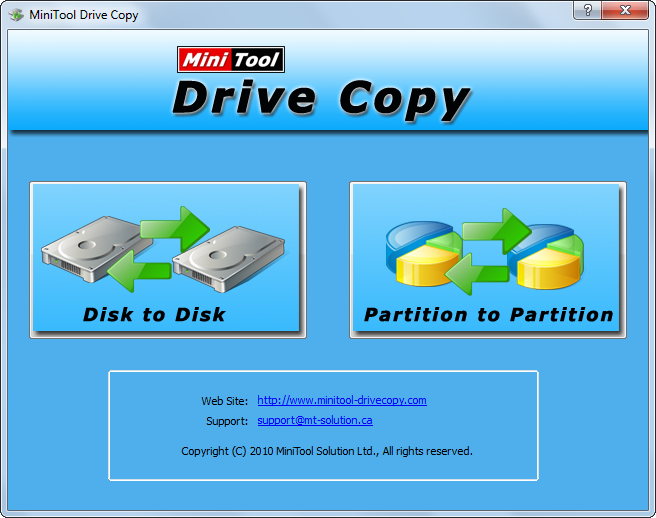
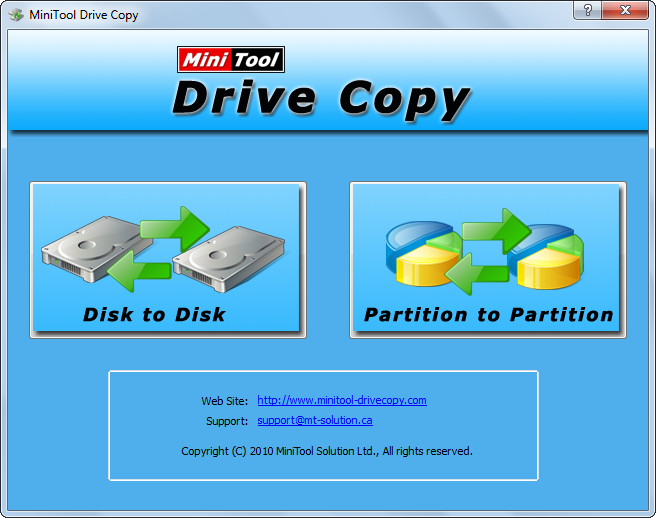
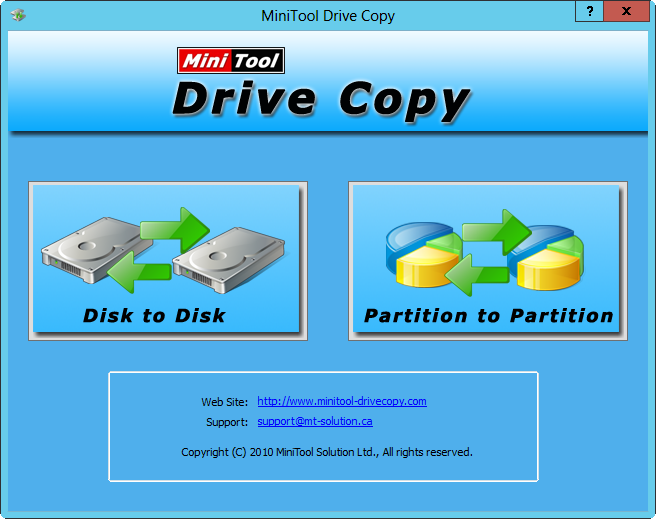
Step 1: launch the free drive clone software to get its starting interface below:
minitool-drive-copy-starting-interface
Step 2: choose the module “Partition to Partition” to clone a single partition.
copy-boot-files-select-system-reserved-partition-to-clone
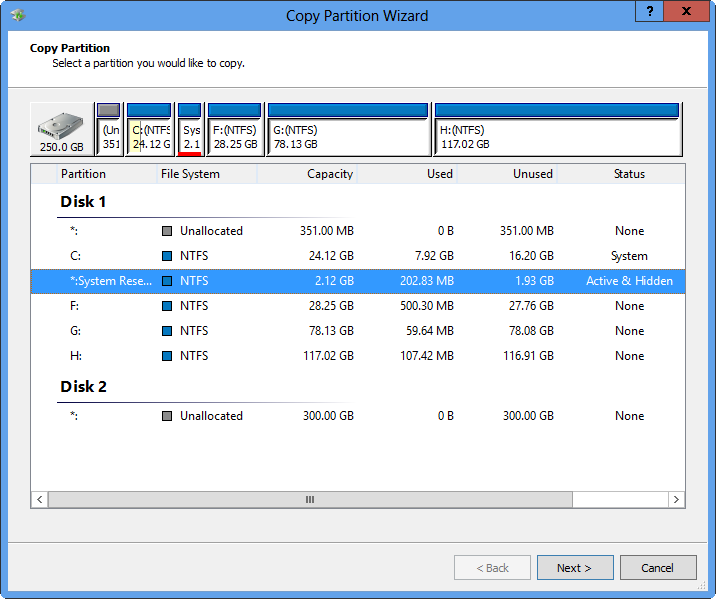
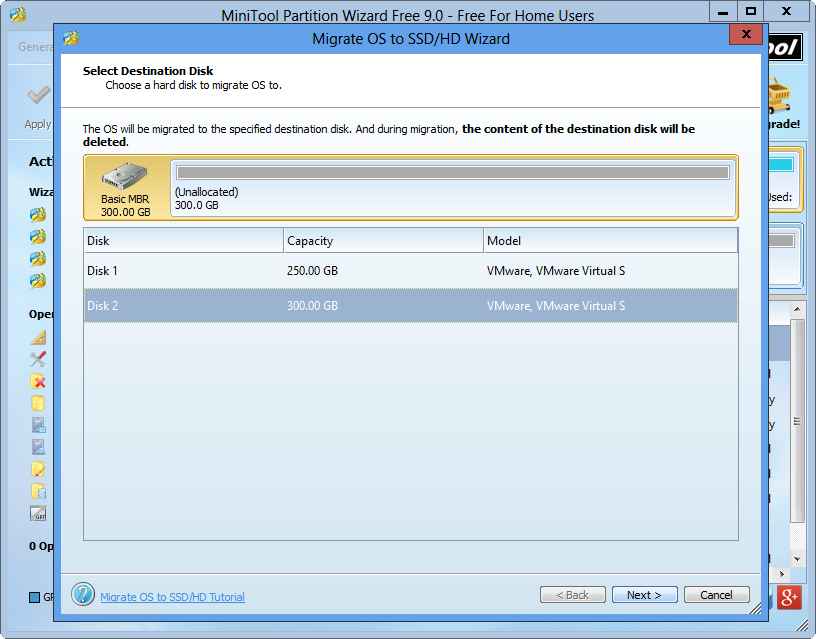
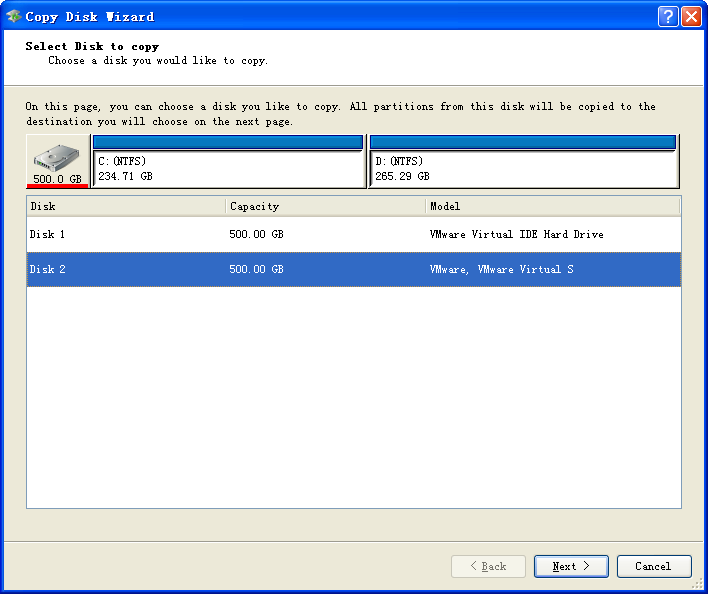
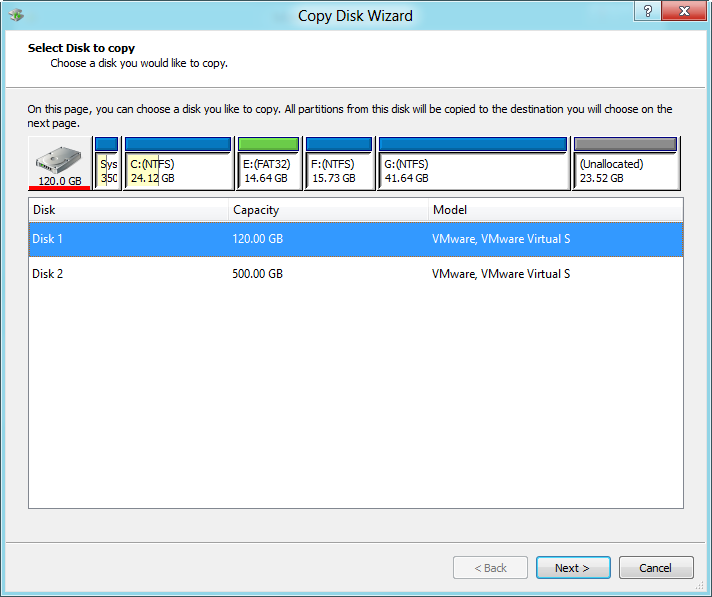
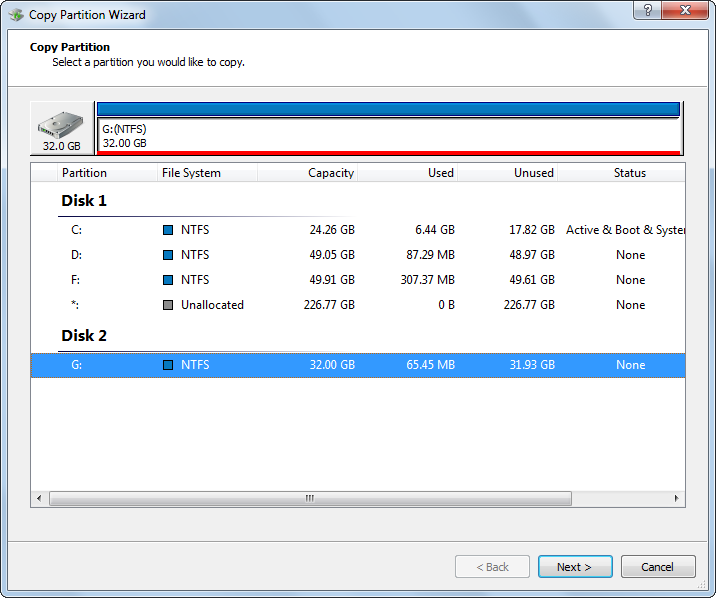
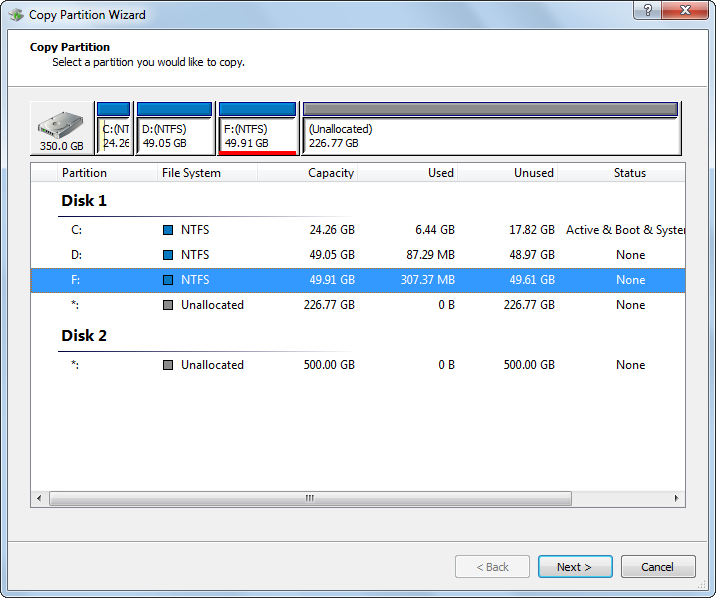
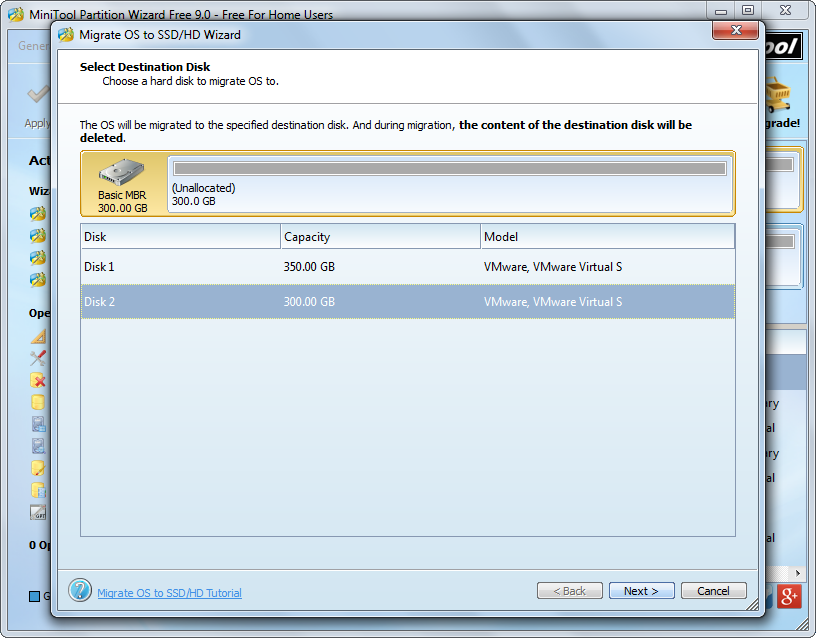
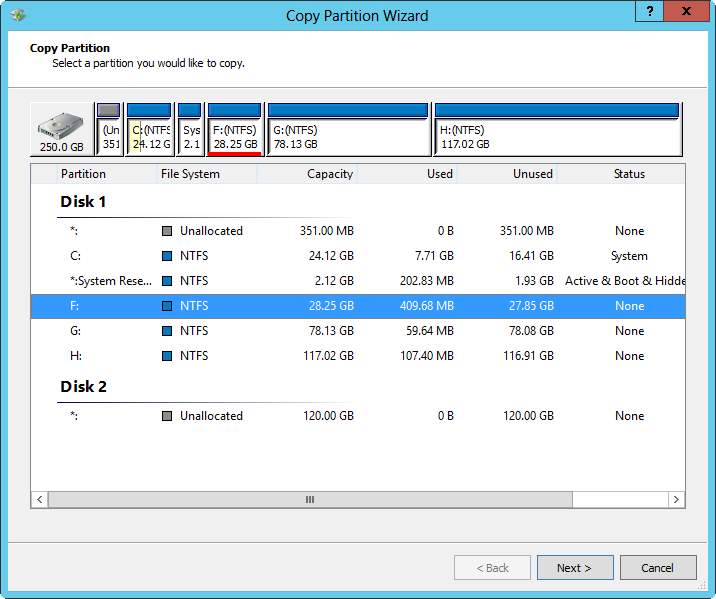
Step 3: select the system reserved partition to clone and click “Next>”. Then, select a target partition to save boot files stored on the system reserved partition and click “Next>” to get the windows below. Note: all data on the target partition will be destroyed, so users need to transfer significant ones in advance.
copy-boot-files-resize-system-reserved-partition
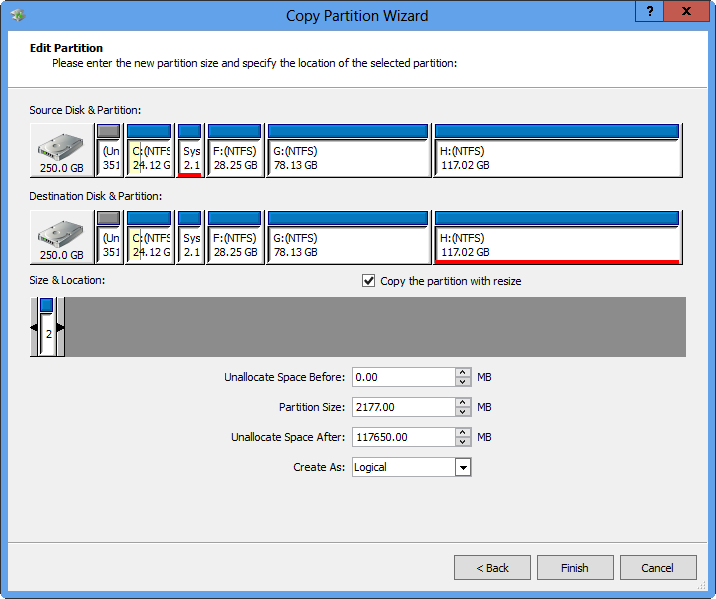
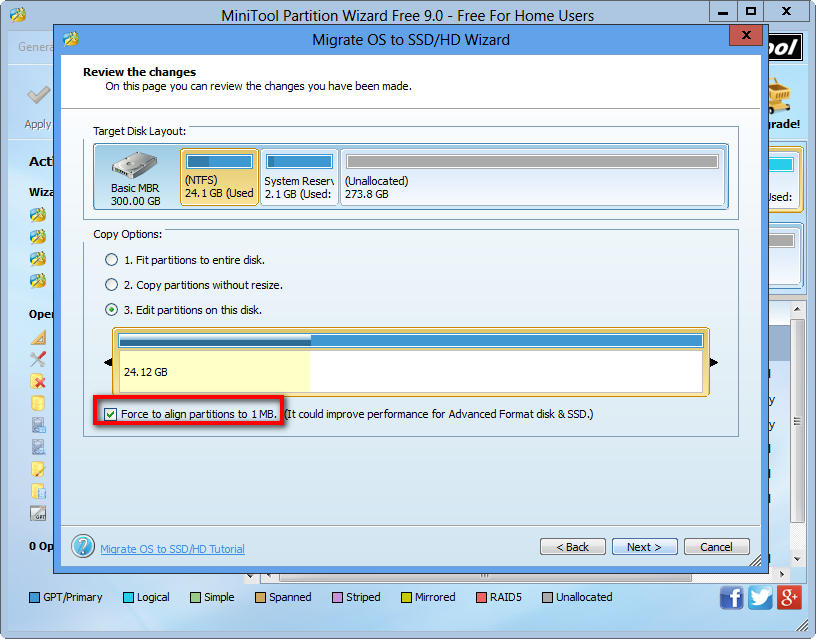
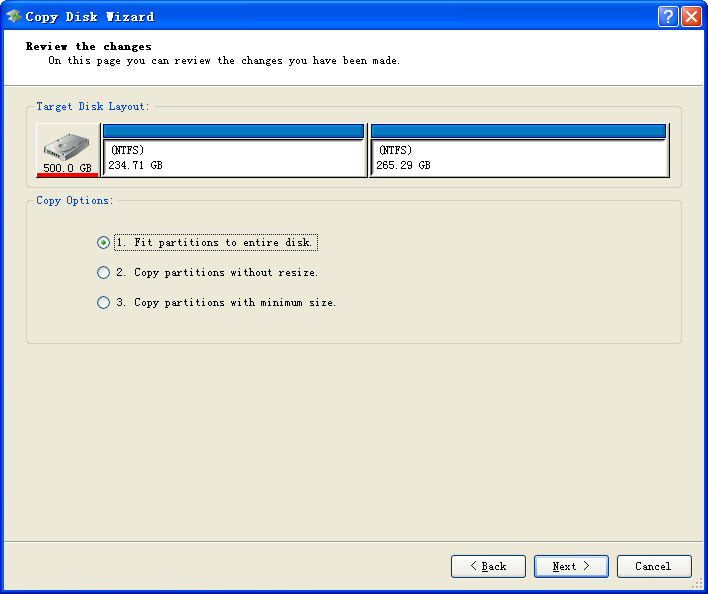
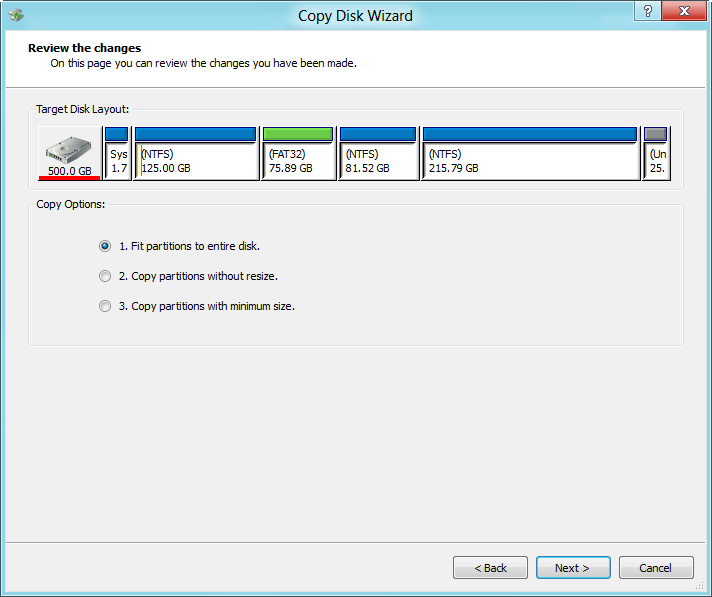
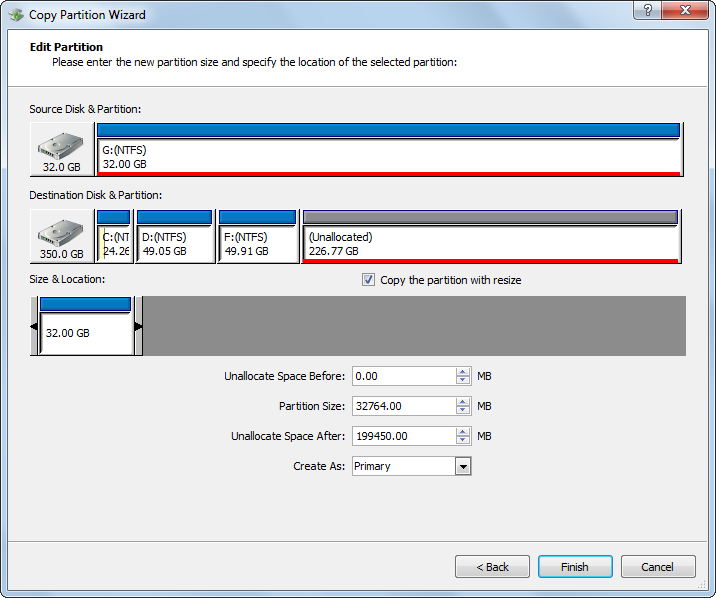
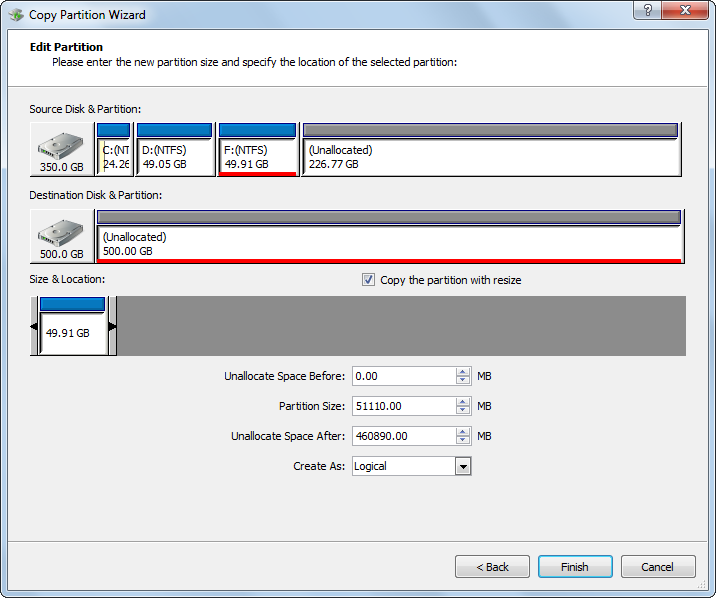
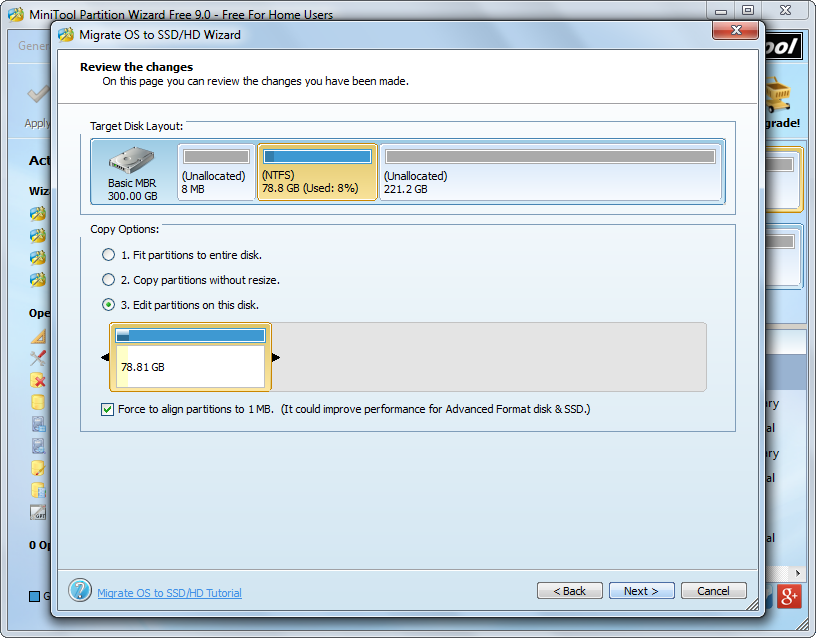
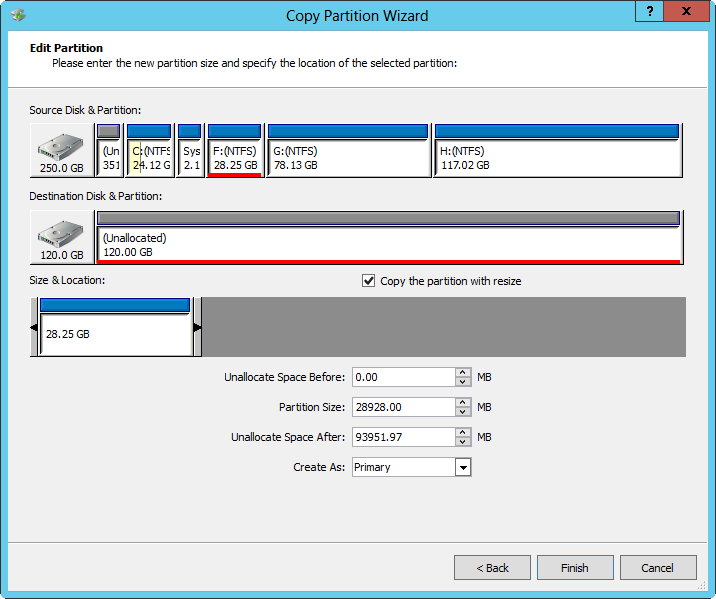
Step 4: change the size and location for the target partition and click “Finish”.


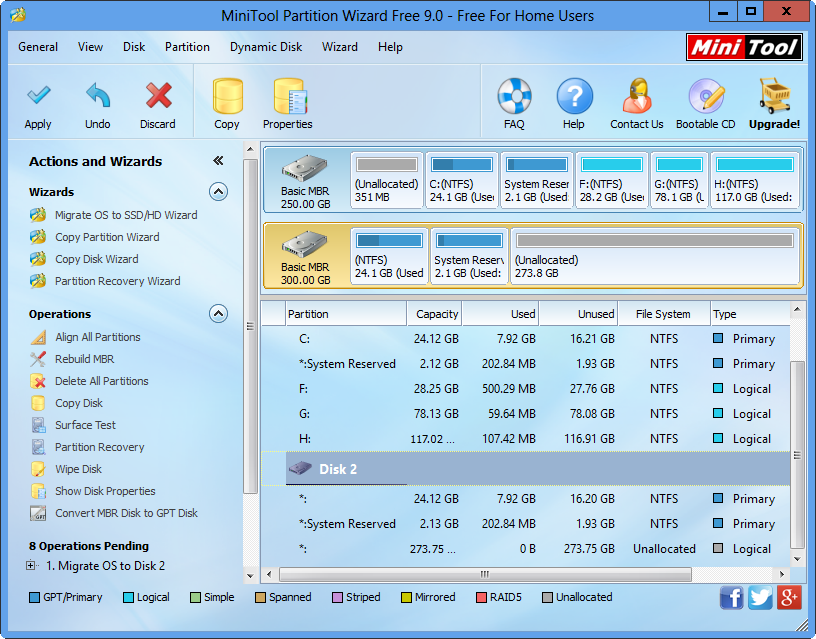
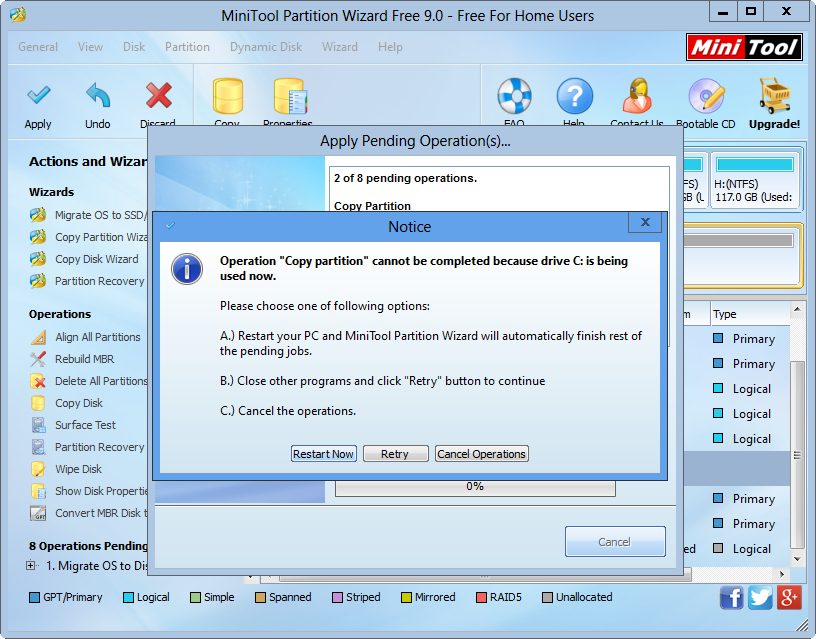
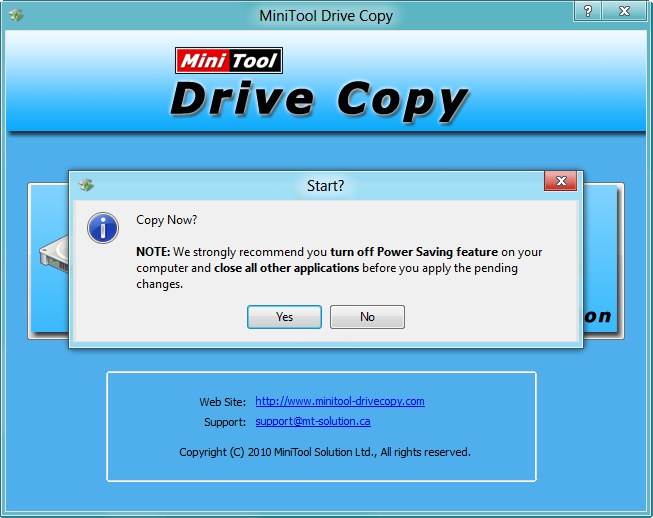
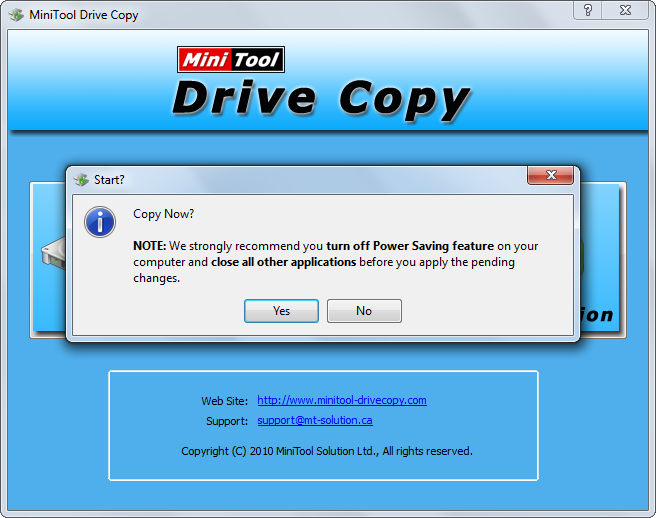
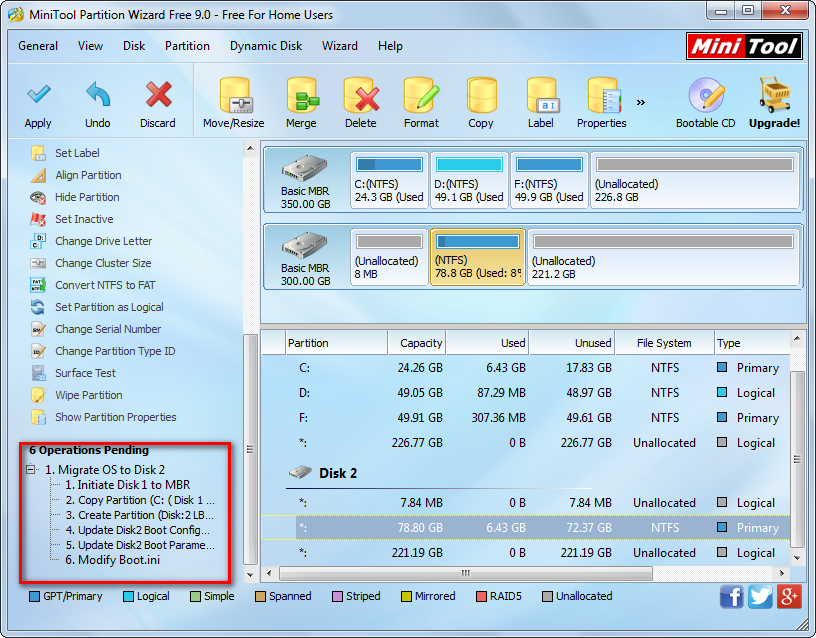
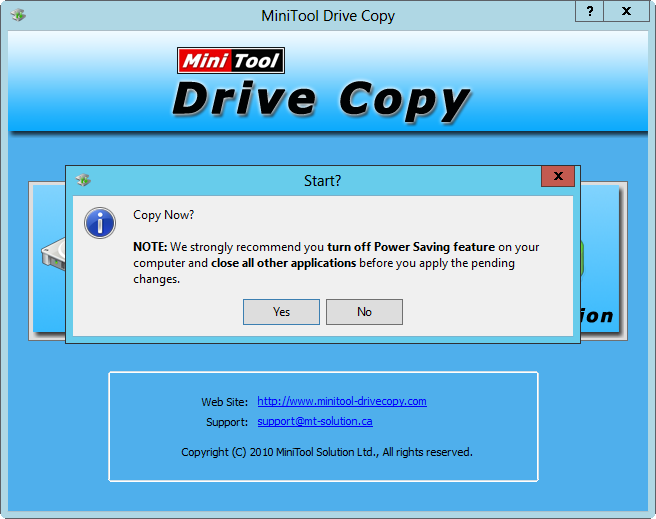
Step 5: click “Yes” to apply all changes. After all operations are performed, our boot files will be copied to other partitions. And the backup can be used to restore Windows when virus or our mistaken operation destroys the source. What users need to do is clone the target system reserved partition back to its source disk via MiniTool Partition Wizard Bootable CD.


If you are worried about Windows security, copy boot files to other partitions or clone entire Windows OS to another disk.

Copy Windows to SSD with correct alignment

Since installing Windows on solid state drive will enhance boot speed and data read-write speed to a large extent, more and more users are planning to transfer their Windows OS from HD to SSD. And the easiest way is to clone Windows. Nevertheless, users should pay much attention to the issue 4k alignment, which influences performance of advanced format hard disk and solid state hard disk largely. If partitions on SSD are not aligned, drive performance will be reduced. So, how to copy Windows to SSD with correct alignment?


As known to all, there are many programs for users to download to migrate Windows, but most programs do not take 4k alignment into consideration since this is a new technology. Aiming at this situation, we suggest using the free drive copy software MiniTool Partition Wizard since it will align partitions on SSD correctly and automatically during Windows migrating. Well then, how does this program copy Windows to SSD with correct alignment? Please look at the following demonstration.


Note: MiniTool Partition Wizard is free for Windows home users only, and server users need to purchase the server edition.


How to Copy Windows to SSD with Correct Alignment


Step 1: run MiniTool Partition Wizard to get the starting interface of this free drive copy software, and then choose “Launch Application” to get the window below:
minitool-partition-wizard-main-interface
Step 2: choose the function “Migrate OS to SSD/HD Wizard” from the left pane.
copy-windows-to-ssd-select-ssd
Step 3: select the SSD to save the copy of Windows and click “Next>”. Note: all data on SSD will be erased, so please transfer significant ones.
copy-windows-to-ssd-change-partition-size-and-location
Step 4: change the size and location for partitions on SSD and click “Next>”. Here we can see the option “Force to align partitions to 1MB”. Please check this option and all partitions on SSD will be aligned. After that, a boot note which is quite useful for legacy BIOS users will appear. Read it and click “Finish” button to get the window below:
copy-windows-to-ssd-apply-change
Step 5: click “Apply” button on the top to apply all changes.
copy-windows-to-ssd-restart-computer
Step 6: click “Restart Now” to apply all changes in boot mode, which is to protect our system. When all changes are completed and Windows boots from SSD, we can say to copy Windows to SSD with correct alignment is completed successfully.


Now try using this free drive copy software to migrate Windows from one disk to another disk.

Image hard disk from old laptop to PC

After a laptop has been used for a very lone time, many users would want to ditch it since it runs slowly or current hardware configuration like hard disk, RAM, and CPU cannot meet actual demands. Well then, how to deal with needed files saved in the deprecated laptop? It is highly suggested that users image the hard disk from old laptop to PC or to another laptop if there are lots of files to transfer, which saves a lot of time.


To complete this kind of operation, users only need to download a piece of drive clone software from the internet. Considering that most users would like to download freeware, we suggest using MiniTool Drive Copy. It is free for Windows 2000 Professional, Windows XP, Windows Vista, Windows 7, Windows 8, and Windows 10 users. Moreover, to clone a hard disk from old laptop to PC can be realized in easy and safe operations.


As a matter of fact, this free drive clone software can also be used to migrate or backup Windows apart from common files. Cloning disk via this program includes a lot of operations, including copying partitions, creating partition to save the copy of source partition, and updating boot configuration and parameters. Therefore, Windows saved on the copy of the source disk will be bootable. Well then, how to image a hard disk from old laptop to PC with this program? Specific operations are as follows.


Image Hard Disk from Old Laptop to PC with MiniTool Drive Copy


First of all, take out the hard disk from the PC and make it the slave of laptop. If users are cloning hard disk from old laptop to another laptop, clone the disk to an external hard disk, and then image the external disk to another laptop. After these preparations, launch the free drive clone software on the laptop to get its starting interface below:
minitool-drive-copy-starting-interface
In the starting interface, please choose “Disk to Disk” module to get the window below:
image-hard-disk-from-old-laptop-to-pc-select-source-disk-to-copy
Now please choose the disk users would like to clone and click “Next>”. Then, select the disk that will save the copy of the source disk and click “Next>”. After these operations, users will see the following interface:
image-hard-disk-from-old-laptop-to-pc-edit-disk-layout
In this interface please choose a copying method to edit the layout of the target disk and click “Next>”. Then, a boot note showing how to boot from target disk will emerge. Read it and click “Finish” button. At last, click “Yes” to perform all previous changes. When MiniTool Drive Copy completes all operations, the hard disk will be imaged to PC from the old laptop.


Nevertheless, to backup Windows OS via this program will clone other unnecessary files. If users want to image Windows only, please see Migrate OS to SSD/HD to get more details.

How to clone disk 0 to disk 1

Question: with multiple important partitions contained on disk 0, including Windows boot partition, recovery partition, ESP partition and OEM partition, I want to make a backup for this disk. Nevertheless, I’m a newbie to this topic, so who can tell me how to clone disk 0 to disk 1 in easy operations and without data loss?


To backup a hard disk is no longer a piece of complex work as long as users find good solutions. Nowadays, professional drive clone software is able to image one disk to another disk, and some of them are even free. Here, we take MiniTool Drive Copy for example. It is free for non server Windows users and helps clone all information on disk 0 to disk 1, including Windows system files, Windows startup files, all installed programs, and so on. Furthermore, it will fix and upgrade boot information during the process of disk clone so as to make Windows on disk 1 bootable. Well then, how to clone disk 0 to disk 1 by using this free drive clone software? Next, we will show users detailed operating steps.


How to Clone Disk 0 to Disk 1 with MiniTool Drive Copy


When this program has been installed, please run it to get the following starting interface:
minitool-drive-copy-starting-interface
Here are 2 modules, and we need to choose “Disk to Disk” since it is specially designed to backup hard disk. After selection, all disks will be shown:
clone-disk-0-to-disk-1-select-source-disk
Here, please select the source disk to clone and click “Next>”. Then, choose a target disk to save the copy of the source disk and click “Next>”. Note: disk 1 shown by Drive Copy is disk 0 in Disk Management, and disk 2 is disk 1. After these operations, users are given right to choose the layout of target disk:
clone-disk-0-to-disk-1-choose-layout-for-disk-1
Please choose a desired one and click “Next>” button to get a boot note which shows how to boot from target disk. Read it and click “Finish” to get the window below:
clone-disk-0-to-disk-1-start-cloning
At last, click “Yes” to perform all previous changes. Once this process is done, to backup hard disk is completed. Note: if disk 0 saves Windows OS which is running, users will be asked to reboot computer, which is to protect system and brings no damage.


Now users would know how to clone disk 0 to disk 1 by using the free drive clone software MiniTool Drive Copy. For users who are planning to edit partition size and location on disk 1, they are suggested using MiniTool Partition Wizard. Detailed operations can be found from Copy Disk.

Files too large to copy to USB flash drive

In general, files bigger than 4G will be too large to save to a FAT32 formatted USB flash drive. Moreover, if users clone the partition which saves files larger than 4G to a FAT32 formatted device, the same problem may emerge. What’s the reason? Please see Why Is File too Large for Destination File System to get the specific answer. Well then, how to solve the problem? Under this situation, to convert FAT32 to NTFS is a good choice since the latter file system supports files larger up to 16EB, but how to complete the conversion without data loss?


The free partitioning software MiniTool Partition Wizard is highly recommended for users to do this operation since Windows built-in Disk Management utility requires formatting the USB flash drive. Next, let’s see how to fix the issue Files Are Too Large to Copy to USB Flash Drive by using this program.


How to Convert FAT32 to NTFS with MiniTool Partition Wizard


Firstly, connect the USB flash drive with computer, and then run this free partitioning software to get the starting interface. Next, click “Launch Application” module to get the main interface shown below:
minitool-partition-wizard-main-interface
In the main interface above, please select the FAT32 partition on USB flash drive and then click “Convert FAT to NTFS” module from the left pane to get the window below:
convert-fat32-to-ntfs-start-converting
Now we can see the current file system is FAT32 and will be converted to NTFS. At this time, as long as we click “Start” button, the free partitioning software MiniTool Partition Wizard will start converting file system automatically, which brings no damage to data. After the conversion is completed, we can save large files or clone the partition which saves large files to the target USB flash drive.


If users are troubled by the same problem, try solving it by taking this method. It is believed that most of you can master it with ease.

Free Windows system clone

To clone Windows brings users a lot of convenience. For example, users can restore Windows OS via the backup in easy operation; to clone Windows helps migrate OS from one disk to another disk without reinstallation. Well then, how to complete free Windows system clone with ease? Using third party program is a wise choice.


Searching system cloning tools on the internet users will find a great number of results. Nevertheless, Windows OS cloned by most programs is often unbootable since these programs do not fix and upgrade boot information. Aiming at this situation, we suggest using MiniTool Partition Wizard. Reasons are as follows:
1. Free for all Windows users except server users.
2. Very easy to use.
3. Bring no damage to Windows.
4. The cloned Windows OS is bootable.


Next, we will show users detailed steps to clone Windows OS.


How to Free Clone Windows System with MiniTool Partition Wizard


Step 1: run this free system cloning tool to get its starting interface and click “Launch Application” to enter the main interface below:
minitool-partition-wizard-main-interface
Step 2: choose the functional module “Migrate OS to SSD/HD Wizard” from the left action panel. Note: this function just clones the Windows which is running, so please run the target one if you have multiple operating systems.
free-windows-system-clone-choose-a-disk-to-save-the-copy
Step 3: select a disk to save the copy of Windows OS and click “Next>”.
free-windows-system-clone-choose-a-copying-method
Step 4: choose a copying method from 3 and click “Next>”. After that, a note which shows how to boot from the target disk will appear. Read it and click “Finish” to get the window below:
free-windows-system-clone-apply-change
Step 5: click “Apply” button on the top and then the free system cloning tool will clone the current Windows system to target disk automatically.


Now clone your Windows OS for system migration or backup. Moreover, if you want to clone all installed programs, both Windows and apps, copy the entire hard disk.

Clone flash drive to PC

Question: my 32 GB flash drive is filled with files so that I want to transfer them to local hard disk of PC so as to free up space. Nevertheless, I’m unwilling to copy and paste files one by one, which will cost me a lot of time, but want to clone the entire flash drive to PC. Is there a good way to complete the clone?


It is indeed time-wasting to transfer files one by one especially when there are a great number of data to migrate, and now free drive copy software can help clone the entire flash drive to PC or other storage devices. In this post we recommend MiniTool Drive Copy since it is free for non server users, highly safe to ensure data security, and easy to use.


MiniTool Drive Copy provides users with 2 modules to backup important files. One is to clone the entire disk to another disk, and the other is to clone one of partitions to another partition or unallocated space. After selecting needed module, users will be given specific prompts so that mistaken operation can be reduced to the largest extent. Next, we will show users how to image a flash drive to PC step by step.


How to Clone Flash Drive to PC with MiniTool Drive Copy


Firstly, launch the program to get the window below:
minitool-drive-copy-main-window
There are 2 functional modules, namely “Disk to Disk” and “Partition to Partition”, and we need to choose the latter to image one of partitions on flash drive to PC (there is always one partition on flash drive since it is a kind of removable device). After that, the following interface will appear:
clone-flash-drive-to-pc-select-source-partition-on-pc-to-clone
In the interface above, please select the source partition on flash drive to clone and click “Next>”. Then, choose a target partition or unallocated space on PC to save the copy and click “Next>”. Note: if users choose an existing partition to save the copy, please transfer all its important data at first, for all data stored on the target partition will be erased. After these operations, the free drive copy software will give users chances to change the size and location for the new partition:
clone-flash-drive-to-pc-move-resize-new-partition
Here users can resize partition by changing the length of partition handle or move partition location by changing the position of the handle. Then, click “Finish” to get the window below:
clone-flash-drive-to-pc-start-copying
Now as long as users click “Yes”, MiniTool Drive Copy will clone the flash drive to PC automatically. If users realize mistaken operation, clicking “No” will discard all previous changes without bringing any influence on data.


After seeing the introduction above, users would be clear about how to image a flash drive to PC in easy operations. Just try using this free drive copy software when there is a need. For disk to disk clone, please see Copy Disk.

Clone a partition to Samsung T1 SSD

As a portable solid state disk, Samsung T1 is much lighter in weight, faster in read-write speed, and higher in security. Therefore, this new type of SSD is welcomed by lots of users who are often on a business trip. Well then, how to transfer business materials from local hard disk to Samsung T1 in an easy way? If the entire disk contains needed files, clone the local disk to SSD. If needed files are saved in one partition, clone the partition to Samsung T1 SSD. This helps avoid much trouble.


Clone a Disk or Partition to Samsung T1 SSD


Since Windows does not offer a good function to clone disk or partition, it is highly suggested that users turn to third party drive clone software. Here, MiniTool Drive Copy is recommended for it will not bring any damage to data even if accidents like power outage emerge during the process of cloning. Moreover, only several steps are needed. Next, let’s take copying a partition to Samsung T1 for example.


How to Clone a Partition to Samsung T1 SSD with MiniTool Drive Copy


Firstly, launch the free drive clone software to get its starting interface shown below:
minitool-drive-copy-starting-interface
In this interface please choose “Partition to Partition” module since it is specially designed to copy a single partition. After that, all disks and partitions will be listed:
clone-partition-to-samsung-T1-ssd-select-source-partition
Now please select the partition which needs cloning and click “Next>”. Then, choose a partition or unallocated space on the Samsung T1 to save the copy of the source partition and click “Next>”. Note: since copying partition to an existing partition will destroy all data saved on the second partition, please transfer useful files in advance. After these operations, users will be given a chance to set the size and location for the new partition:
clone-partition-to-samsung-T1-ssd-move-resize-partition
Here, users can change the length of the partition handle to resize partition and change the position to move partition location. Then, click “Finish” to get the following interface:
clone-partition-to-samsung-T1-ssd-start-copying
At this time, users only need to click “Yes” button, and then the free drive clone software will start cloning the source partition to Samsung T1 SSD. Once MiniTool Drive Copy shows successful clone, the work is done.


Now users would find a good way to transfer files from local disk to Samsung T1 portable SSD.

Successfully cloned Windows but won’t boot

Question: in order to migrate Windows 7 to the newly bought solid state disk, I imaged the partition which saves Windows to SSD. But disappointingly, after I deleted the original system partition, Windows won’t boot successfully  from the cloned system partition. What’s the reason and how to make it bootable?


Generally, when boot partition and system partition are contained in the same partition, most users would like to clone system partition to transfer Windows rather than clone the entire hard disk since there are always multiple partitions on the system disk, but it is not a wise choice.


Why Windows Won’t Boot Successfully from Cloned  System Partition


Since Windows Vista, BOOTMGR rather than NTLDR is used as the boot manager, which visits BCD (a boot file) and finds the exact bootable disk and partition via disk signature (the ID of each disk) to load Windows kernel files. Cloning the Windows system partition to a second hard disk will definitely copy the BCD, but the BCD still records the signature of the first disk. Therefore, BOOTMGR will load Windows kernel files from the first disk. At this time, if Windows system partition on the first disk has been deleted, Windows will not boot even if the system partition has been cloned to the second disk successfully.


Well then, how to make a bootable Windows? Here, we suggest cloning Windows OS with MiniTool Partition Wizard, and it just copies files about Windows.


How to Migrate Windows with MiniTool Partition Wizard


First of all, launch the program to get its starting interface and click “Launch Application” module to get the following window:
minitool-partition-wizard-main-interface
In this interface please choose the module “Migrate OS to SSD/HD Wizard”. Note: this function just migrates the Windows which is running.
migrate-windows-select-target-disk--to-save-copy
Then, select the target disk to save the copy of Windows and click “Next>”.
migrate-windows-move-resize-system-partition
Next, change the size and location for Windows system partition on the target disk and click “Next>”.
migrate-windows-boot-note
The interface above shows how to boot computer from the destination disk, so please see it carefully and click “Finish” to get the window below:
migrate-windows-apply-change
From this interface we know migrating Windows with Partition Wizard contains 6 operations which make Windows bootable. At this time, please click “Apply” button on the top to perform all changes. Note: users need to restart computer since Windows they clone is running.


Now users would know why Windows won’t boot from the successfully cloned system partition. If you also want to migrate Windows and make it bootable, try this solution.

Computer cloning tool free download

It is a wise choice to make a backup for important files saved on our computers since this will help us make a faster restoration. Well then, what is the fastest and safest way to do such a clone especially when there are lots of files to backup? At this time, downloading a free computer cloning tool is the best choice, and MiniTool Drive Copy is worth a try.


Instead of copying files one by one, this Windows computer cloning program copies the entire hard disk or images a partition in one go, which saves much time and enhances data security. I have used it to clone a Windows system disk, and this just cost me 8 minutes. Well then, how to download the free computer cloning tool to backup or transfer our important files? Both professional downloading centers like CNET and this website are good places. Next, let’s see how easy it is to complete this kind of clone.


How to Backup Files with MiniTool Drive Copy


After downloading and installing the free computer cloning tool, we need to launch it to get the starting interface like this:

minitool-drive-copy-starting-interface
There are 2 modules listed here, namely “Disk to Disk” and “Partition to Partition”. The former is to clone a disk, and the latter is to image a single partition. Please select the appropriate one according to actual demands. Here, we take “Partition to Partition” for example. Choose this module and we can see the following window:
image-partition-select-source-partition
Now please select the partition which needs cloning and click “Next>”. Then, select an unallocated space to save the copy (if there is) and click “Next>”. If not, please choose a relatively empty partition instead, but users should transfer needed files in advance for all files saved in this partition will be destroyed.
image-partition-change-partition-size-and-location
In the interface above please change the size and location for the new partition and click “Finish”.
image-partition-apply-all-operations
At last, click “Yes” to start imaging the source partition.


Now to backup important files is completed, and operations are pretty simple, right? When you have lots of files to backup, download this free computer cloning tool and it will make your work easy. For disk clone, please see Copy Disk to get more information.