Author Archives: zxl123

Hard disk to hard disk clone

Question: recently I bought a 1TB hard disk to replace the old disk, and the old one will be for data storage only since it is so small (only 120GB). Searching on the internet I found the best way is doing hard disk to hard disk clone since it will transfer all original information to new disk, including Windows, installed programs, and other files. Nevertheless, there are so many disk clone tools on the internet that I do not know which one to download. Can someone give me suggestions?


Indeed, there are so many programs which can help complete hard disk to hard disk clone, but disk clone failures often emerge since users choose a poor program. For example, the cloned Windows cannot boot for boot information like Boot.ini is not modified or updated in the process of copying hard disk. Considering these failures, we recommend using MiniTool Drive Copy for non server users and MiniTool Partition Wizard Server Edition for server users. It is very easy to operate both programs, and next let’s take MiniTool Drive Copy for example to see detailed steps.


How to Make Hard Disk to Hard Disk Clone


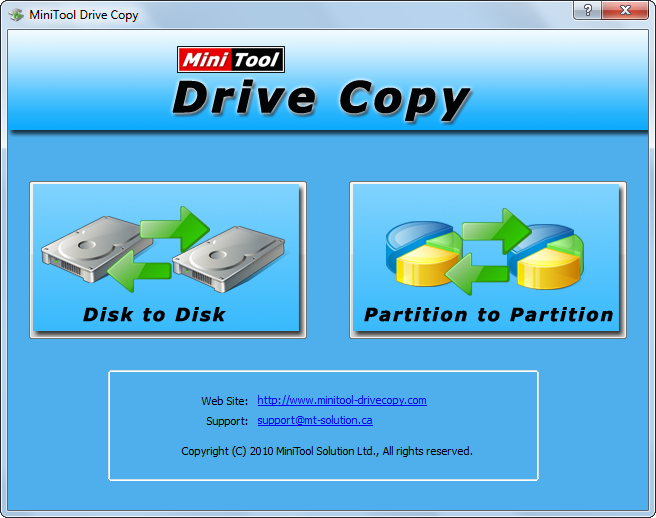
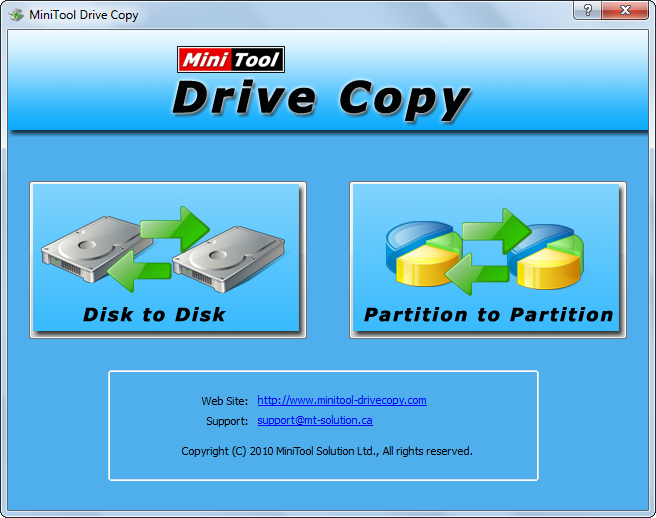
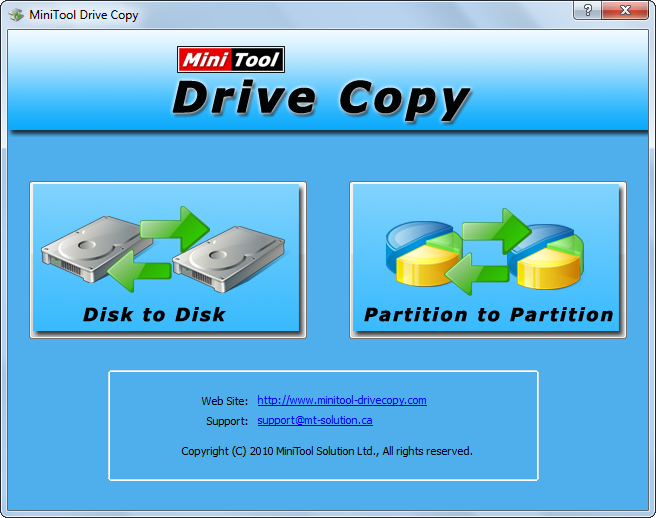
Step 1: download and install this free disk clone tool to PC or laptop, and then launch it to get the window below:
minitool-drive-copy-starting-interface
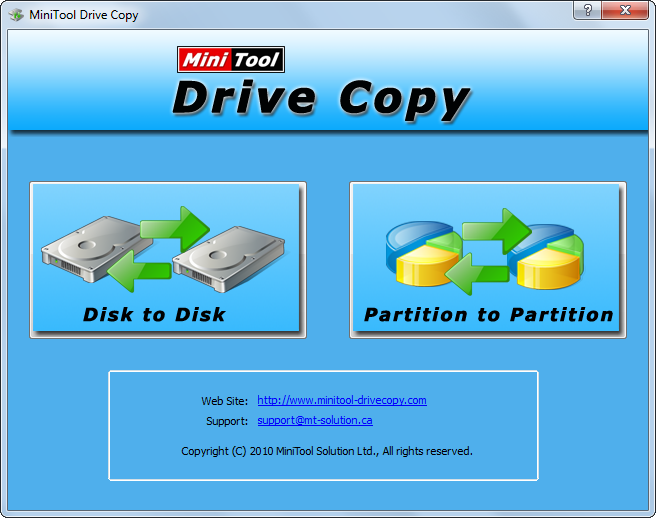
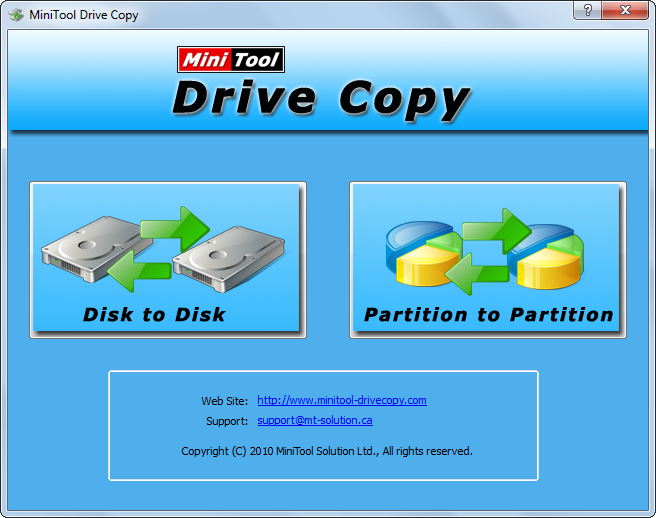
Step 2: choose “Disk to Disk” module since it helps copy the entire hard disk.
how-to-make-hard-disk-to-disk-clone-select-source-disk
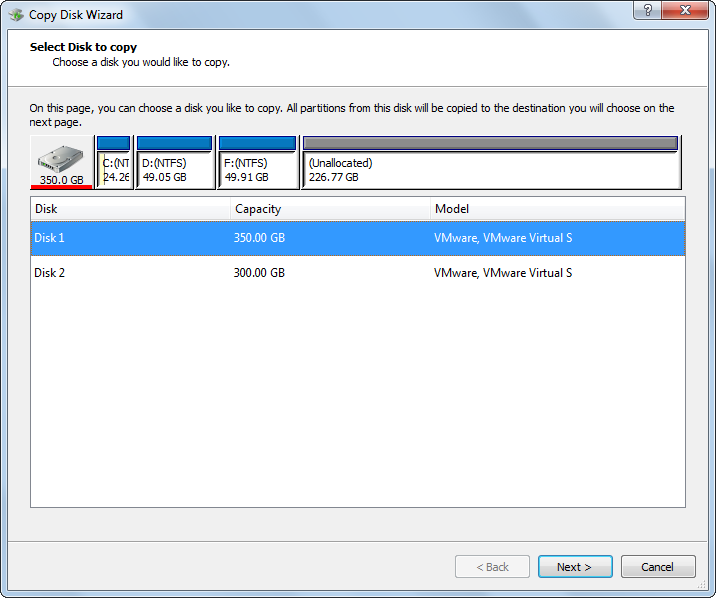
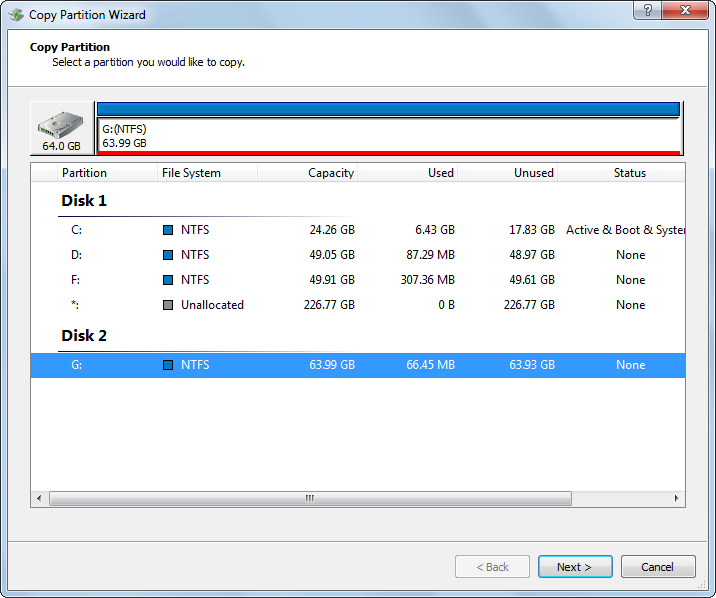
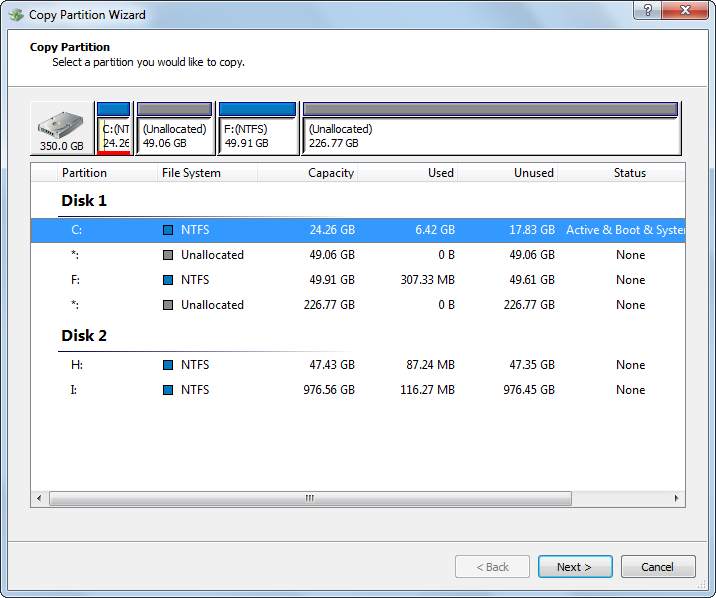
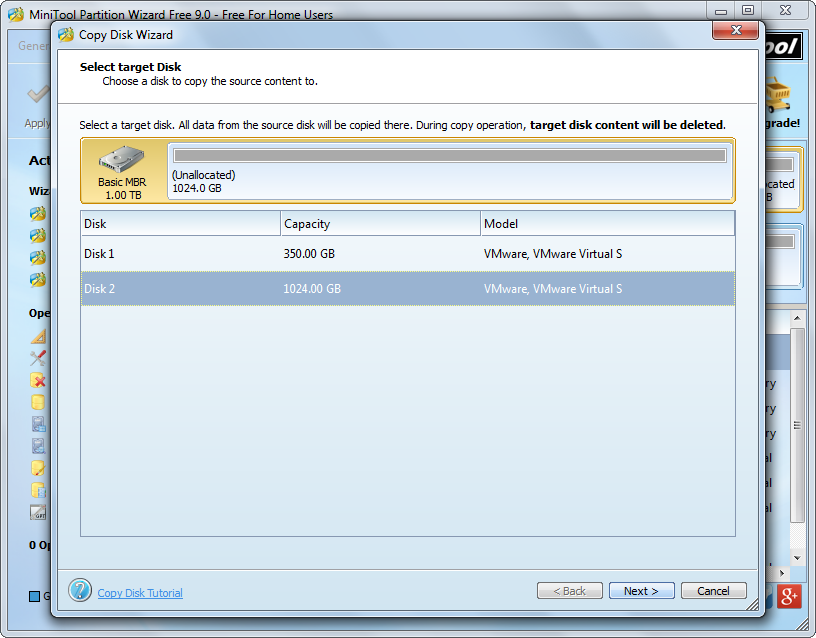
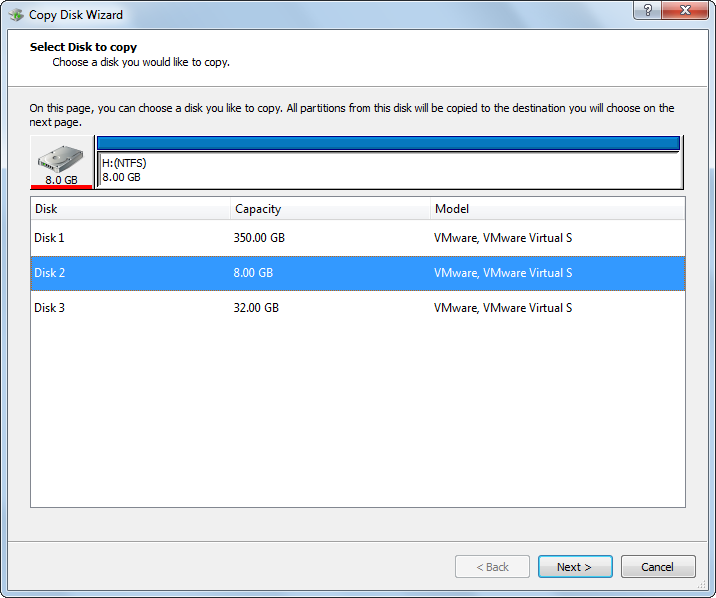
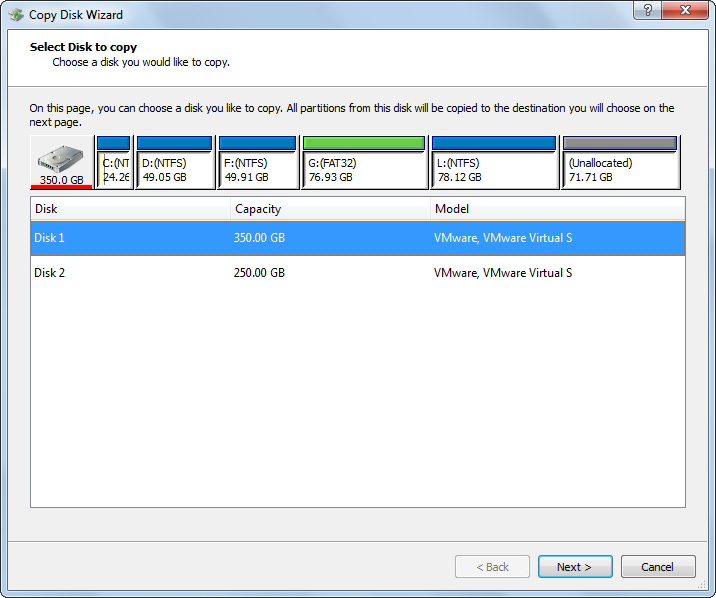
Step 3: select the source disk to clone and click “Next>”. Then, select the new disk to save the copy of the source disk and click “Next>”.


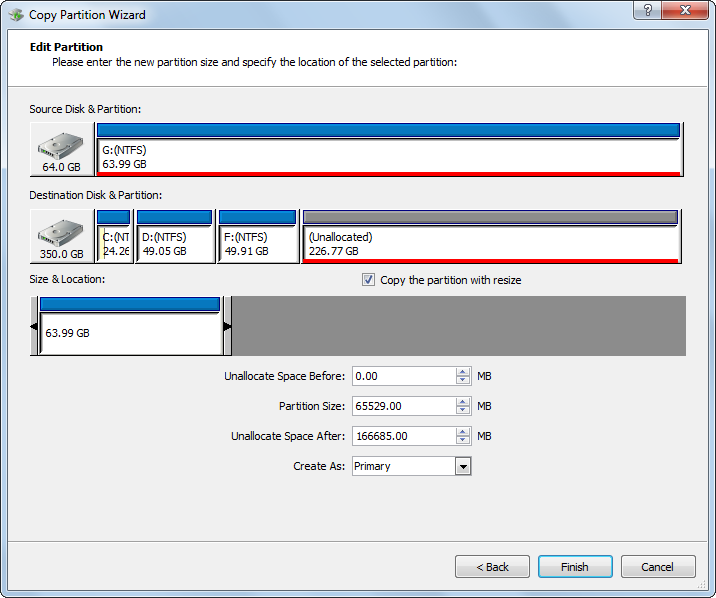
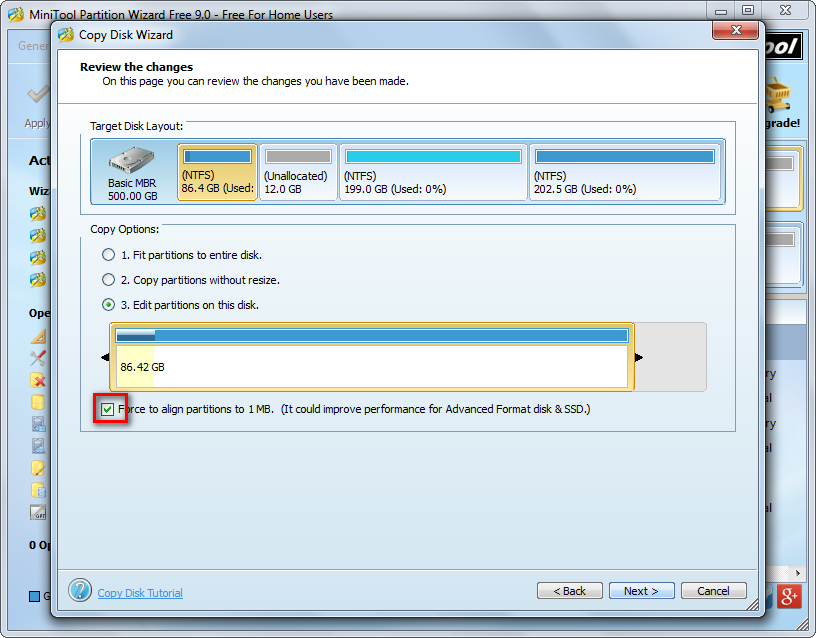
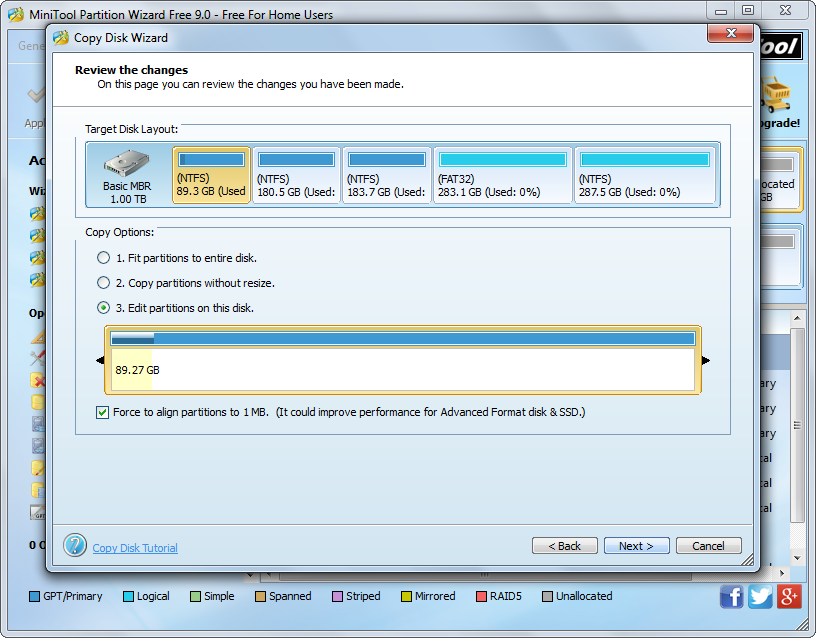
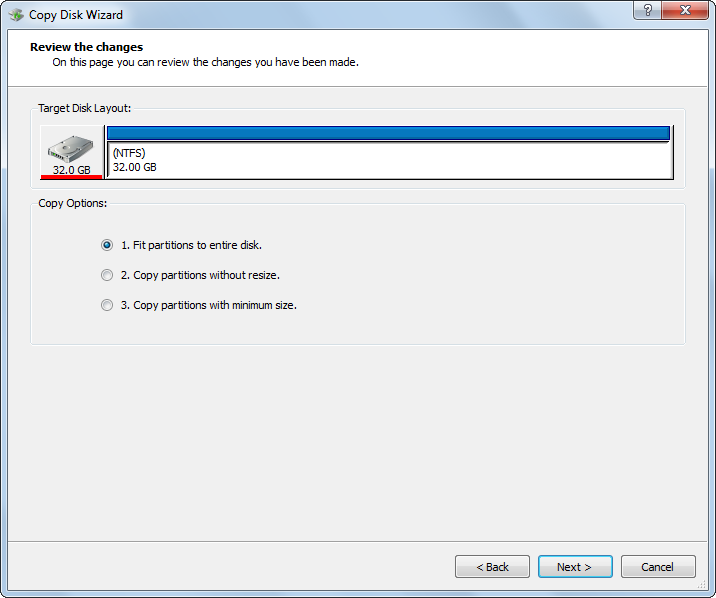
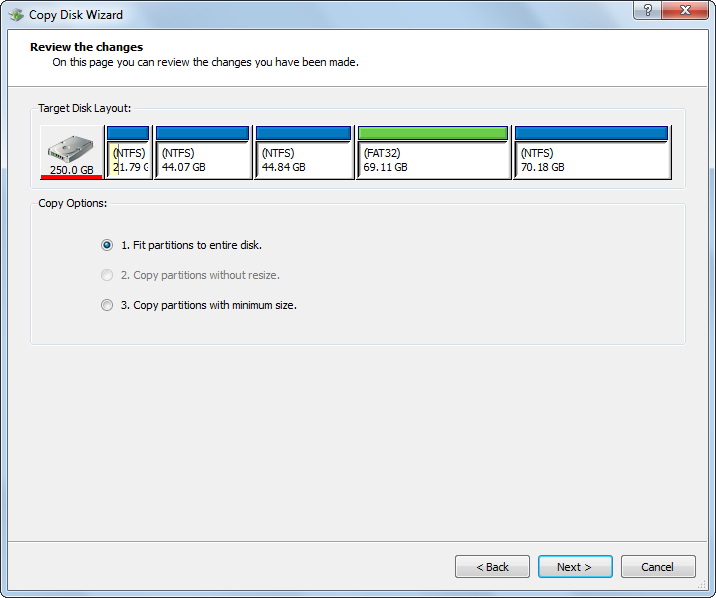
Step 4: choose a copying method to decide the layout of new disk and click “Next>”.


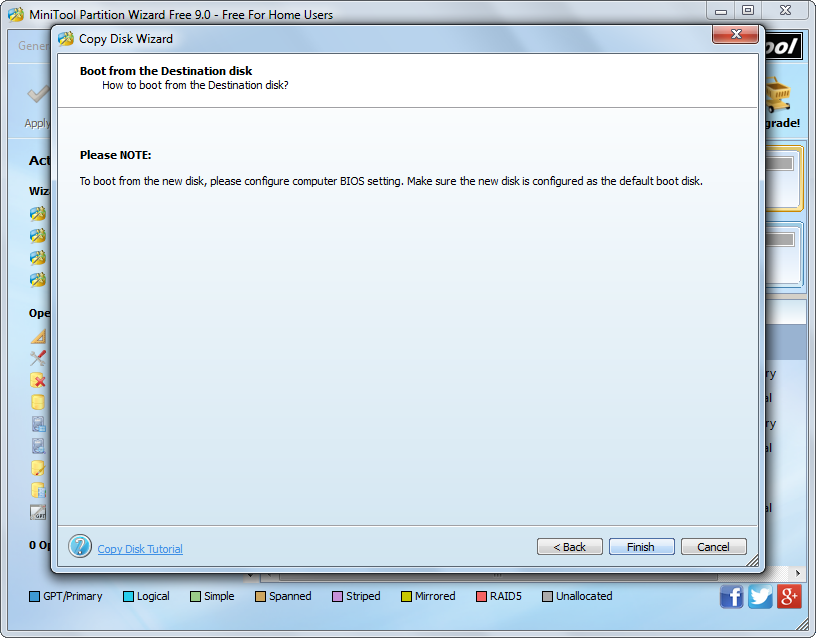
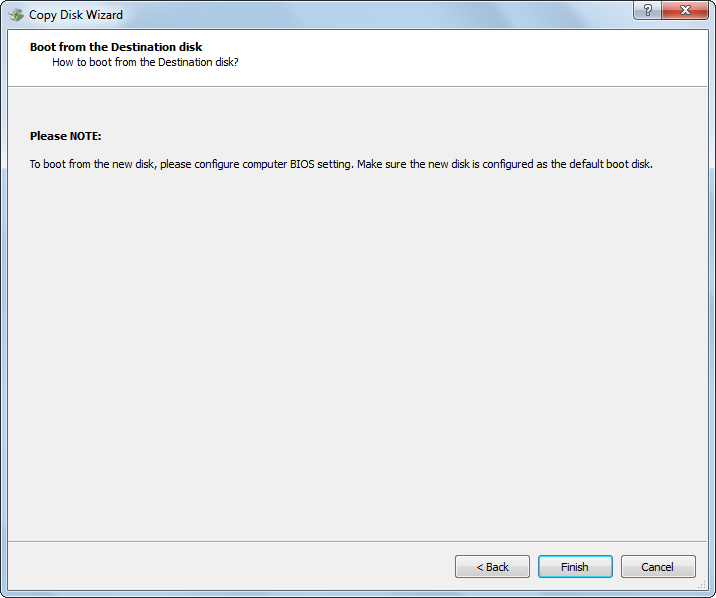
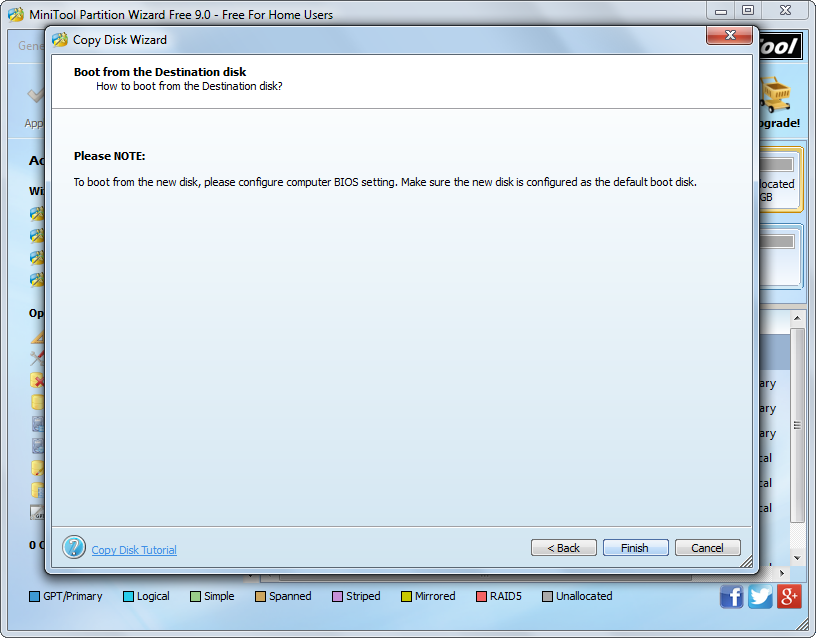
Step 5: read the boot note which shows how to boot computer from new disk successfully, and then click “Finish”.


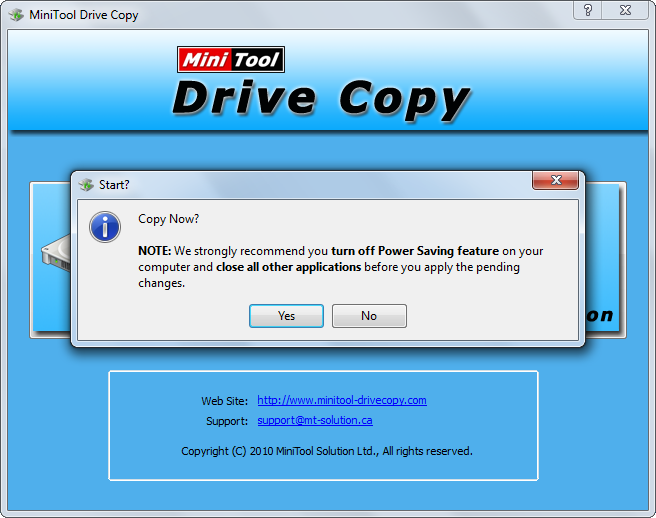
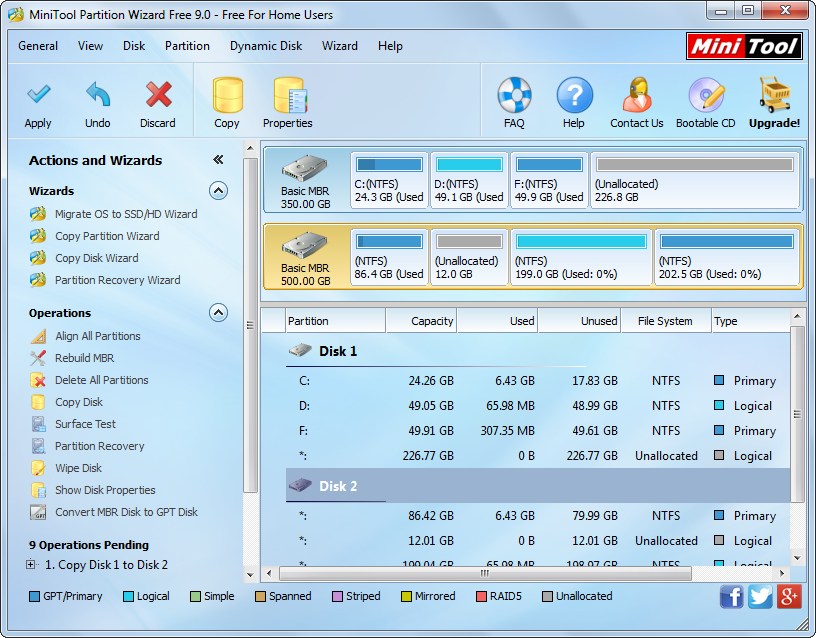
Step 6: click “Yes” to start copying hard disk.


Notice: since the source disk saves Windows which is running, MiniTool Drive Copy will prompt users to restart computer. For sake of data security, please do as told, and then the disk clone tool will perform hard disk to hard disk clone in boot mode. Once all operations are completed, the computer will reboot. Please enter BIOS setting during reboot and then set the new disk as the default boot disk. For GPT + UEFI users, there is no need to make such a setting. After the computer reboots successfully, users can deleted all data saved on the source disk to free up space for future use.


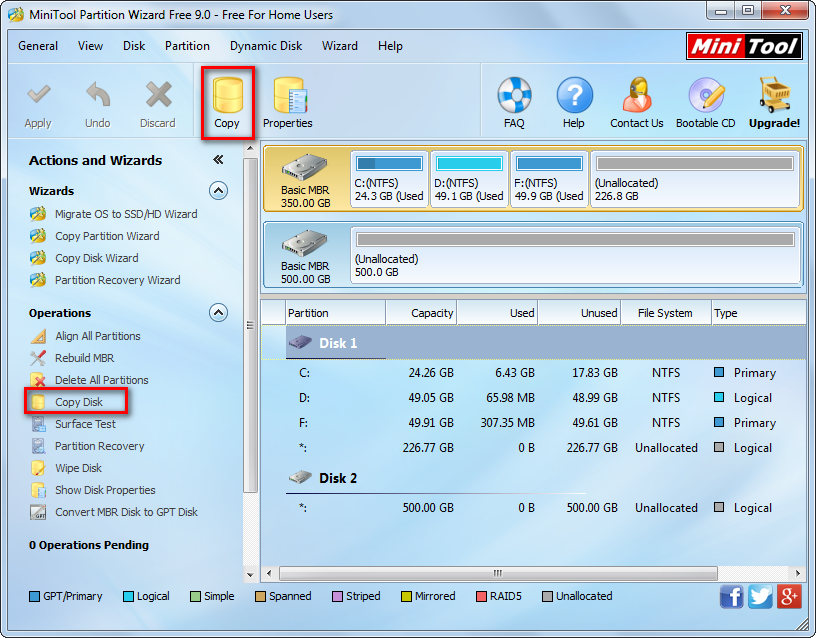
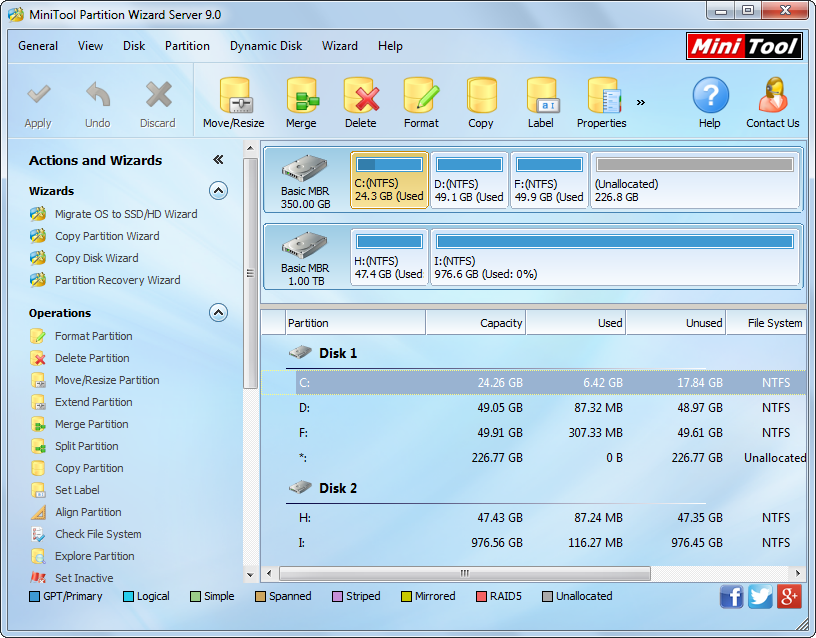
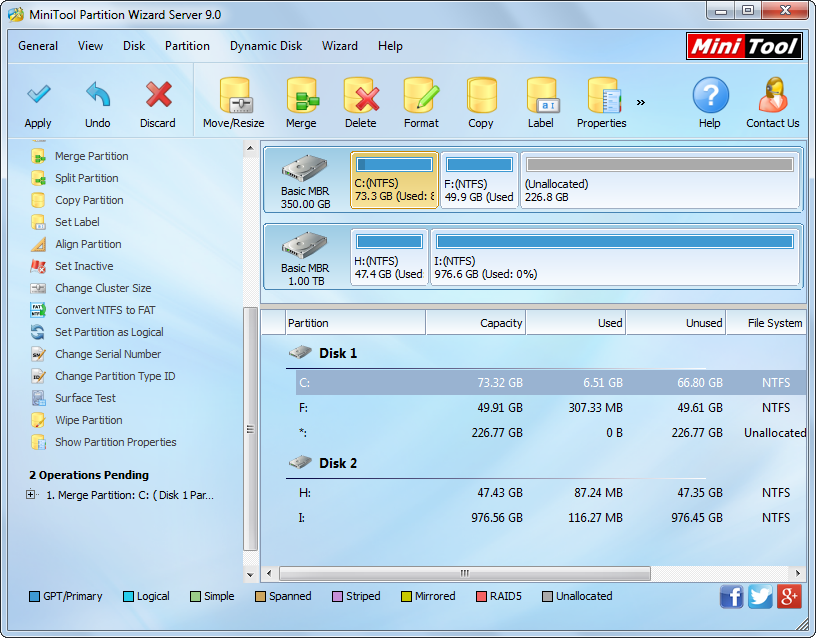
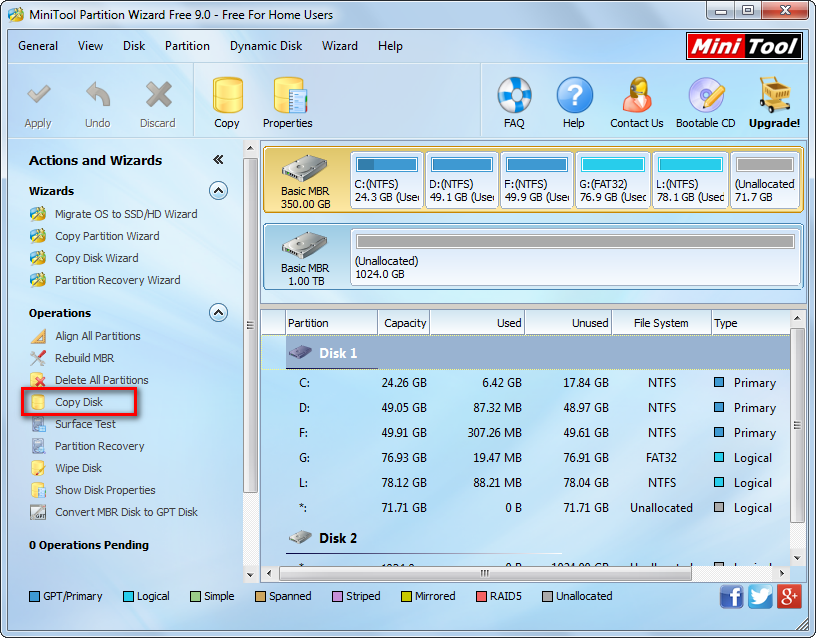
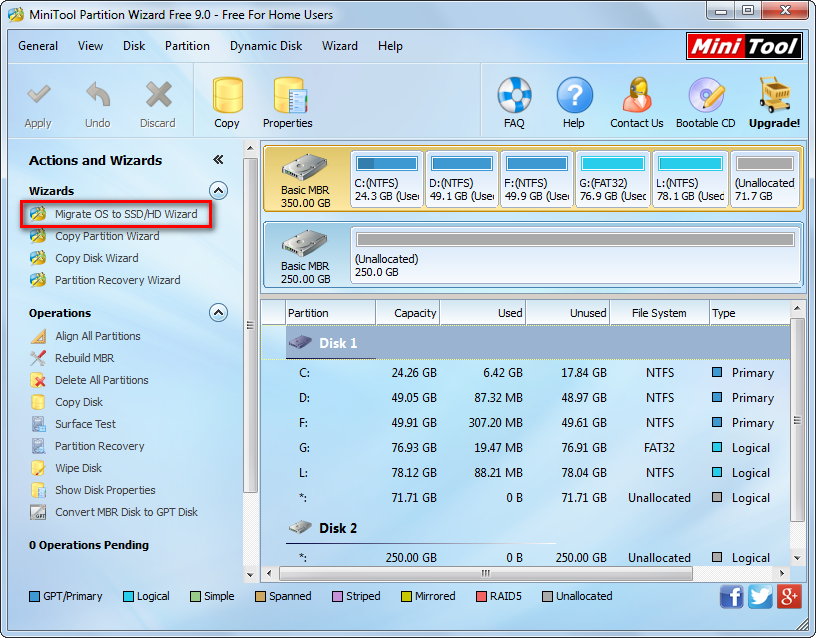
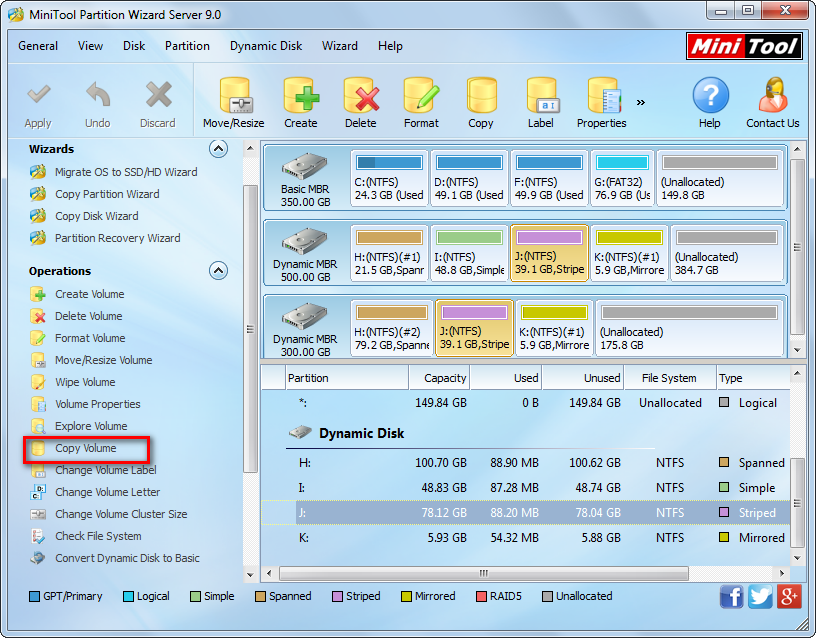
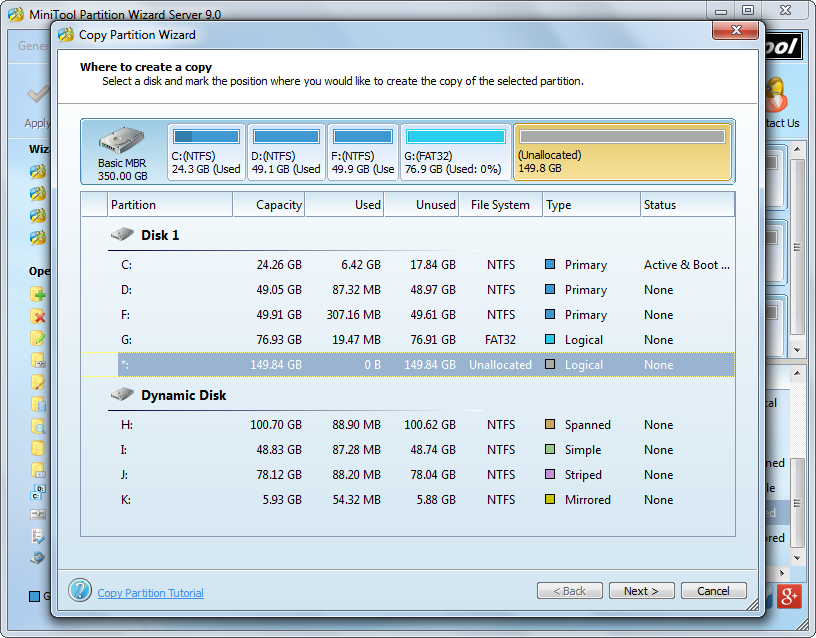
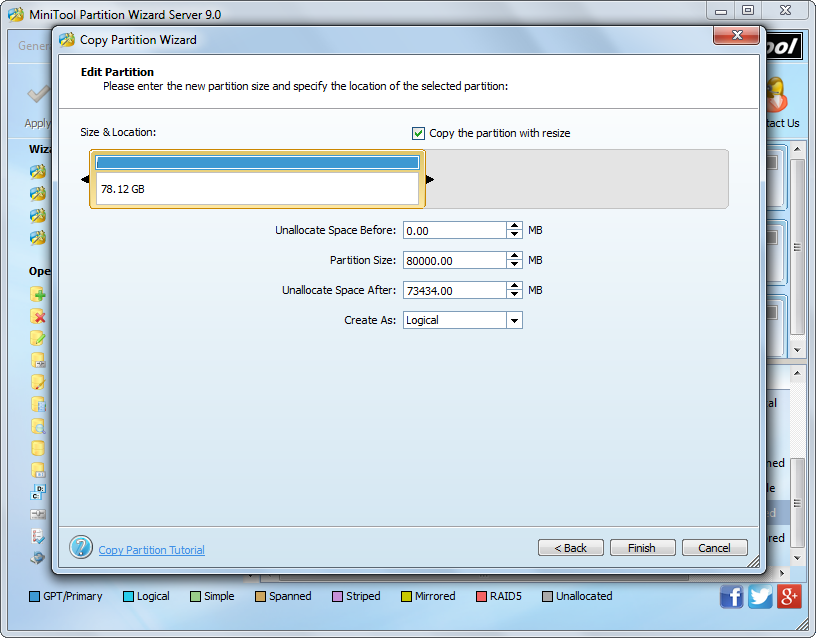
To copy hard disk of Windows server, please make use of MiniTool Partition Wizard Server Edition.

Upgrade memory card of digital camera to larger

Nowadays, capacity of memory card becomes larger and larger, ranging from 1G to 128G or larger. Therefore, many users hope to upgrade their small memory card of digital camera to larger ones. Well then, how to complete this kind of upgrade without losing any original information?


A lot of users choose to copy and paste photos and videos one by one from the old memory card to computer or to the larger memory card, which is of course not a wise choice especially when there are more than 10GB files saved, because it will cost much time. Here, we recommend a quite time-saving method, namely cloning the small memory card to larger one or imaging partitions on old memory card to local disk. And free drive clone software can help do it in easy operations.


The freeware MiniTool Drive Copy is highly suggested when users want to upgrade small memory card of digital camera to larger ones. 3 reasons for recommending it: free for all non server users, safe enough to protect every file, and easy to operate. As to detailed steps, please look at the following demonstration.


How to Upgrade Memory Card of Digital Camera to Larger without Data Loss


First of all, download and install the free drive clone software MiniTool Drive Copy to computer, and then connect both memory cards with computer (if users want to clone the small memory card to larger one) or plug the small memory card only (if they want to image the memory card to local hard disk). Next, launch the program to get its starting interface:

minitool-drive-copy-starting-interface
Here are 2 modules, namely “Disk to Disk” and “Partition to Partition”. Please choose the former to clone the entire memory card to another card or choose the latter to copy a single partition. Now we take cloning a partition for example. Choose the corresponding module and we can see the following interface:
clone-partition-select-source-partition
In this interface please select the partition which needs copying and click “Next>”. Then, choose an existing partition or unallocated space to save the copy and click “Next>”. After that, we are able to change the size and location for the new partition:
clone-partition-move-resize-new-partition
To resize partition, please change the length of partition handle. To move partition, please change the location of the partition handle. After that, click “Finish” to get the window below:
clone-partition-start-copying
Now please click “Yes” to start cloning the source memory card. At this time, users only need to wait until the free drive clone software completes all changes. Once the copy is created, they can use the new memory card on digital camera without worrying about data loss, wherever the old card is.


This is the end of how to upgrade small memory card of digital camera to larger ones, and users can have a try. Of course, they can also try copying the entire memory card, which is the same as copying hard disk.

Backup hard disk sector by sector

When there is a need to clone system disk (namely the disk which saves Windows OS), it is highly suggested that users backup the entire hard disk sector by sector. If not, Windows OS may be unbootable for some boot information will not be cloned. Well then, how to complete this kind clone? Third party drive clone software is needed since Windows does not provide such a feature.


Here, we suggest using MiniTool Partition Wizard Free or MiniTool Partition Wizard Server Edition. The former is free for all non server users, and the latter (chargeable) works well on Windows servers. Moreover, several steps are needed, and all data will be protected to the largest extent. For example, if power outage emerges suddenly during the process of disk clone, both programs will restore the hard disk to the original state. Next, we take MiniTool Wizard Free for example to clone system disk. Please look at the following steps.


Backup Hard Disk Sector by Sector with Partition Wizard Free


First of all, launch the drive clone software and choose “Launch Application” to get the interface below:
minitool-partition-wizard-main-interface
In this interface please select the disk which needs cloning and choose “Copy Disk” from the left pane or choose “Copy” from toolbar to get the window below:
backup-hard-disk-sector-by-sector-select-disk-to-save-the-backup
Now please select the disk that will save the backup of the source disk and click “Next>”. After that, users will be given choice to decide the layout of target disk:
backup-hard-disk-sector-by-sector-move-resize-partition
In the interface above users can change partition size and location for the target disk. Moreover, there is an option “Force to align partitions to 1MB”, which can improve computer performance when users clone disk to advanced format disk or SSD. After all changes are made, please click “Next>” to get the window below:
backup-hard-disk-sector-by-sector-boot-note
This is a note showing how to boot from the target disk. See it carefully and click “Finish” to go back to the main interface:
backup-hard-disk-sector-by-sector-apply-changes
Now we can see disk 1 has been cloned to disk 2 whose partitions are without drive letters. At this time, please click “Apply” button on the top to apply all changes. Once the application is completed, we backup hard disk sector by sector successfully.


If users want to clone system disk and make it bootable, MiniTool Partition Wizard Free or Server Edition may be helpful. For video help, please refer to Copy Disk.

Duplicate Windows 8 system disk

Files saved on computer may get lost due to mistaken operation, virus attack, and hardware damage. For faster system recovery and data recovery, a lot of users would like to make a backup for the entire hard disk if there is an extra disk. Well then, how to duplicate Windows 8 system disk in an easy way? Is any third party software needed?


In general situations, we backup important files by copying and pasting them to another place or device. Nevertheless, this method is recommended only when there are not so many files to backup. To duplicate the entire Windows 8 system disk, users had better employ a piece of free drive copy software. Here, MiniTool Drive Copy is highly recommended. It is free for all non server Windows users.


This drive cloning software is capable of copying a single partition as well as backing up the entire hard disk in very easy operations, and all data will be protected. Next, let’s see detailed steps.


How to Duplicate Windows 8 System Disk with MiniTool Drive Copy


Firstly, launch the free drive copy software to get its starting interface below:
minitool-drive-copy-starting-interface
Then, choose the module “Disk to Disk” to make a backup for entire disk. After that, all disks will be listed like this:
duplicate-windows-8-system-disk-select-source-disk
Please select the source disk (namely the disk that needs copying) and click “Next>”. Then, select the target disk (the disk that will save the copy of the source disk) and click “Next>”. After these steps, users are able to resize partitions on the target disk:
duplicate-windows-8-system-disk-resize-partition
There are 3 options, and users can choose the best one according to actual demands. Then, click “Next>” to get a boot note shown below:
duplicate-windows-8-system-disk-boot-note
Read the note carefully and click “Finish” to continue.


At last, please click “Yes” to perform all changes. Note: to duplicate Windows 8 system disk requires users to reboot computer since the Windows is running. Do as the free drive copy software told. When all changes are applied in boot mode, we succeed in making a backup for the entire hard disk.


Nevertheless, if users just want to duplicate the Windows OS rather than the entire disk, please see Migrate OS to SSD/HD to get details.

Create a backup for Windows OS

After installing Windows OS successfully, many users would want to make a backup for future system recovery or in case of system crash. Well then, what is the easiest way to create a backup for Windows OS? Next we will give a brief introduction.


To make a backup for Windows, users need to download a piece of free partitioning software from the internet. Here, we suggest using MiniTool Partition Wizard, because it is safe enough to ensure data and system security as well as simplifies operations, but an extra disk is needed to save the backup.


Note: this freeware can only be used on non servers. If users want to make a backup for Windows Server OS, please employ Partition Wizard Server edition.


Create a Backup for Windows OS with MiniTool Partition Wizard


Firstly, run recommended free partitioning software to get the starting interface and choose “Launch Application” module to get the main interface below:
minitool-partition-wizard-main-interface
In the main interface please choose “Migrate OS to SSD/HD Wizard” which creates a backup for running Windows and saves the backup to another disk via cloning boot partition and system partition (sometimes they are in one partition) as well as updating boot information.
create-a-backup-for-windows-os-select-target-disk-to-save-copy
Then, select the target disk to save the copy of the system disk and click “Next>”.
create-a-backup-for-windows-os-resize-partition
Afterwards, resize partitions on target disk and click “Next>” to get the interface below:
create-a-backup-for-windows-os-boot-note
Now a boot note appears, and it shows how to boot from the target disk. If users are planning to migrate OS to SSD or HD rather than create a backup, this note is very important, because users need to set the target disk as the default boot disk in BIOS. Here, users only need to click “Finish” button to continue.
create-a-backup-for-windows-os-apply-changes
At last, click “Apply” button on the top to apply all changes. Since Windows OS is running, users will be asked to restart computer. After the free partitioning software completes all changes in boot mode, the backup for Windows OS will be created, and our computer will reboot.


If users are afraid of system crash, now make a backup for your Windows operating system.

Clone hard disk to a partition

After buying large-capacity hard disk, many users would want to clone the entire old disk to the new large one. Nevertheless, cloning disk to disk will destroy or erase all data saved on new disk, and furthermore most programs just support partition to partition copy or disk to disk copy. Therefore, many users are looking for ways to clone hard disk to a single partition rather than the entire disk. In this post, we will introduce a quite good solution.


Before cloning hard disk to partition, users need to merge all partitions on old disk to one, which will not bring any damage to data. And the partitioning software MiniTool Partition Wizard Professional edition or Server edition can help do it with ease. Detailed steps are as follows:


1. Download and install the program to computer. Then, launch it to get the main interface below:
minitool-partition-wizard-main-interface
2. Select the partition that will be reserved and choose “Merge Partition” function from the left action panel to get the following interface. Note: all operated partitions should be formatted with NTFS. If not, please convert FAT to NTFS in advance.
merge-partition-select-partition-to-expand
3. Click “Next>” to get the window below:
merge-partition-select-partition-to-be-included
4. Select a neighboring partition that will be included and click “Finish” to continue. Here, we can see the area boxed by red line, which shows all data on the second partition will be saved to a folder in the reserved partition, so data loss can be avoided. Moreover, folder name can be changed.
merge-partition-preview-effect
5. Now we can see partition D has been merged to partition C. Please take the same way to merge all partitions to C and click “Apply” button on the top to perform all changes.


After that, users can clone the entire hard disk to a partition via copying partition to partition, and MiniTool Drive Copy (freeware) is quite helpful.


How to Clone Partition to Partition with MiniTool Drive Copy


Firstly, launch the program to get the starting interface:
minitool-drive-copy-starting-interface
Then, select the module “Partition to Partition” to get the interface below:
clone-partition-to-partition-select-source-partition
Now please select the source partition to clone and click “Next>”. Then, select the target partition to save the copy of the source partition and click “Next>”.


Next, change the location and size for the target partition and click “Finish” to go on.


At last, click “Yes” to apply all previous changes.


Now cloning hard disk to a partition is completed via merging partition, and users may have a try when necessary.

Clone disk and expand partition size

When a certain disk especially system disk is running in low disk space, many users choose to replace it with larger ones. At this time, if users want to complete the replacement without data loss, to clone old disk to new disk is the best choice since it will migrate all files. Nevertheless, most users hope to clone disk and expand partition size during this process since original partitions have been running out of space. Well then, which drive copy software is capable of doing this kind of clone? Here, MiniTool Partition Wizard is highly suggested. Reasons are as follows:
1. It is free for all non server users, including Windows 2000 professional, Windows XP, Windows Vista, Windows 7, Windows 8, and Windows 10.
2. During the process of disk clone it allows users to change partition size according to actual demands.
3. All data will be under great protection so that data loss and data damage can be avoided even if power outage emerges.
4. Prompts are shown in every step so that users can master it with ease.


Now that this drive copy software allows users to expand partition size during disk clone, now let’s see how it works.


Clone Disk and Expand Partition Size with MiniTool Partition Wizard


Firstly, download and install the freeware to computer. After successful installation, please run it to get the starting interface and choose “Launch Application” to enter the main interface shown below:
minitool-partition-wizard-main-interface
The main interface shows all disks, so users need to select the one which needs cloning and choose “Copy Disk” function from the left action panel to get the window below:
clone-disk-and-expand-partition-size-select-disk-to-save-copy
Then, select the new disk to save the copy of the old disk and click “Next>”. After this operation, users will be allowed to expand partition size during disk clone:
clone-disk-and-expand-partition-size-change-partition-size
There are 3 choices: Fit partitions to entire disk, Copy partitions without resize, and Edit partitions on this disk. If users want to increase partition size according to their own demands, please choose the third one. Then, resize partitions one by one by changing the length of the partition handle. Next, click “Next>” to get the following note:
clone-disk-and-expand-partition-size-boot-note
It shows how to boot from the new disk, and users need to do as told when rebooting computer. Then, click “Finish” to go back to the main interface:
clone-disk-and-expand-partition-size-apply-change
Now we can see disk 1 has been cloned to disk 2 and the size of every partition has been expanded. At this time, please click “Apply” button on the top to apply all these changes. Note: if users are copying the disk where Windows is running, they need to reboot computer. Don’t worry about the reboot, because the drive copy software MiniTool Partition Wizard will not bring any damage to your data and system.


For video help on cloning disk and expanding partition size, please see Copy Disk.

Clone SD card Android

With saving more and more photos, videos, and apps to SD card of Android smartphone, the SD card is very easy to run in low disk space. Under this situation, many users plan to replace the small card with large ones. Nevertheless, how can these users complete the replacement without losing any information? The best solution is to clone SD card of Android, and free drive clone software can help do it.


Note: since there is little cloning software for android, users had better do it on Windows platform by using Windows drive clone program.


In this post, we highly recommend MiniTool Drive Copy since it is easy to use and free for all non-server users. More importantly, it helps clone any type of SD card of android (all files are included) to another SD card without bringing any damage to original data. Next, let’s see detailed steps.


How to Clone SD Card of Android with MiniTool Drive Copy


Firstly, download and install the free drive clone software to computer. Then, make both SD cards connected with our PC or laptop. Next, launch the program to get its starting interface:
minitool-drive-copy-starting-interface
Here, 2 functional modules are shown, and we need to choose “Disk to Disk” for entire card clone. After that, the following interface will appear:
clone-sd-card-android-select-source-sd-card
Now please select the SD card which needs cloning and click “Next>”. Then, choose the SD card that will replace the old SD card and click “Next>”. Note: all data on the second SD card will be destroyed, so users need to backup needed ones in advance. After these operations, users are given choices to change layout for the new card:
clone-sd-card-android-change-layout-for-target-sd-card
Three options are provided to clone SD card of Android: 1. Fit partitions to entire card; 2. Copy partitions without resize; 3. Copy partitions with minimum size. Please choose the best one according to actual demands and click “Next>” to get a note which shows how to boot from the new disk. Since we are cloning SD card, just ignore it and click “Finish”.


At last, click “Yes” to start copying.


After all operations are completed, we clone SD card of Android via the free drive clone software successfully. It is really an easy solution, isn’t it? Apart from SD card, MiniTool Drive Copy also supports cloning other devices, and users can get more information from Copy Disk.

Backup Windows 7 VMware

Question: in case of system crash, I’m planning to create a copy for the Windows OS which is running in my virtual machine. Is there excellent software which works well on VMware and can help me backup Windows 7? Basically, the copy should be bootable.


Answer: here we will introduce 2 piece of freeware. One is MiniTool Drive Copy, and the other is MiniTool Partition Wizard. Both work excellently on VMware and are free for Windows XP, Windows Vista, Windows 7, Windows 8, Windows 10 and other non server users. Just choose the best one according to actual demands.


How to Backup Windows 7 on VMware with MiniTool Drive Copy


Firstly, run Windows 7 on virtual machine. Then, download and install the drive clone software to VMware. Next, launch the program to get its starting interface:
minitool-drive-copy-starting-interface
Here, please select “Disk to Disk” module to migrate OS since this function will update and fix boot information during the process of Windows 7 disk copying. After the selection, all disks and partitions will be listed:
backup-windows-7-vmware-select-source-disk
Please select the disk which saves Windows 7 to backup and click “Next>”. Then, choose a target disk to save the copy of the Windows 7 disk and click “Next>”.
backup-windows-7-vmware-choose-copy-mode
Next, choose a copying mode to decide the layout of the target disk and click “Next>”. After that, a note which shows how to boot from the target disk will appear, and users only need to click “Finish” button to get the window below:
backup-windows-7-vmware-start-backing-up
Now please click “Yes” to start copying the Windows 7 disk. Once the process ends successfully, backup will be created.


Nevertheless, backing up Windows 7 by using this drive clone software on VMware requires users to image the entire hard disk, so it is more suitable for users who are planning to clone multiple partitions. If users want to backup Windows OS only, make use of MiniTool Partition Wizard.


How to Backup Windows 7 with MiniTool Partition Wizard on VMware


First of all, run this free partitioning software to get its starting interface and choose “Launch Application” to enter the main interface:
minitool-partition-wizard-main-interface
Then, perform the following operations: choose “Migrate OS to SSD/HD Wizard” module from the left panel, select the target disk to create the backup of Windows 7 and click “Next>”, choose a copy method and click “Next>”, click “Finish” to continue, and click “Apply” on the top to apply all changes.


After these operations, to backup Windows 7 on VMware ends. For detailed steps and thumbnail help, please see Migrate OS to SSD/HD.


Now users can either download free drive clone software or free partitioning software to backup Windows OS.

Clone dynamic volume to basic disk

Basic disk and dynamic disk are 2 kinds of disk configurations, and they are different from each other in many aspects. For instance, dynamic disk allows volumes to have noncontiguous space on one or more physical disks while basic disk can’t. Due to these differences, many users think it is impossible to clone dynamic volumes to basic disk. Actually, this is a wrong point of view.


To image volumes to basic disk, users just need to download a drive clone program which supports dynamic disk from the internet, but the problem is that most cloning apps work on basic disks only like MiniTool Drive Copy. Aiming at this situation, we suggest using MiniTool Partition Wizard since it works well on both basic disk and dynamic disk. More importantly, all data will be under great protection during the whole process of cloning dynamic volume to basic disk. For detailed operating steps, please look at the following demonstration.


Clone Dynamic Volume to Basic Disk with MiniTool Partition Wizard


Firstly, download and install the recommended drive clone program to computer. Then, run it to get the main interface shown below:
minitool-partition-wizard-main-interface
Here, all disks (both dynamic disk and basic disk), partitions, and volumes are shown clearly. Imaging volume to basic disk requires an unallocated space on the basic disk, and the space should be large enough to hold all content on dynamic disk. If there is no such space, please shrink one of partitions via the function “Move/Resize Partition” to create. Then, select the volume which needs copying and choose “Copy Volume” from the left pane to get the following interface:
clone-dynamic-volume-to-basic-disk-choose-unallocated-space-to-save-copy
Here, please select an unallocated space on the basic disk to save the copy of the source volume and then click “Next>”.
clone-dynamic-volume-to-basic-disk-change-partition-size-and-location
Then, change the size and location for the new partition (namely the partition which saves the copy) and click “Finish” to go back to the main interface:
clone-dynamic-volume-to-basic-disk-apply-changes
Now we can see the selected dynamic volume namely volume J has been cloned to the basic disk, but it does not have a drive letter. To make new partition visible in Windows Explorer, please appoint it with a drive letter via the function “Change Drive Letter”. At last, click “Apply” button on the top to apply all changes.


Now to clone dynamic volume to basic disk has been completed. In fact, the drive clone program MiniTool Partition Wizard also supports copying basic partitions to dynamic disk apart from imaging volumes to basic disk, and operations are the same. Nevertheless, if users just want to clone partitions or basic disks, the freeware MiniTool Drive Copy is OK.