


When installing Windows 7, we may allocate dozens of GB space for the partition that will save Windows 7 system files (it is always the drive C) and think these space are enough. However, after using the system for a period of time we may find there is little free space left in this partition since programs, system updates, software updates, and so on are saved to this partition continuously. As a result, Windows runs slowly. At this time, if there is a bigger hard disk available, most users would like to transfer Windows 7 to bigger hard drive so as to get smooth computer running. Well then, how can we complete the transferring without bringing any influence on system?
It is highly suggested that users turn to a free system migration software, because using software will simplify operations. However, not any software can be chosen. If you use a program with poor quality to transfer Windows 7 to bigger drive, the migrated system may be unbootable. More seriously, Windows 7 on the source disk may crash. Here we recommend using MiniTool Partition Wizard, which has been proved to be a safe and easy to use system migration freeware.
Transfer Windows 7 to Bigger Drive with MiniTool Partition Wizard
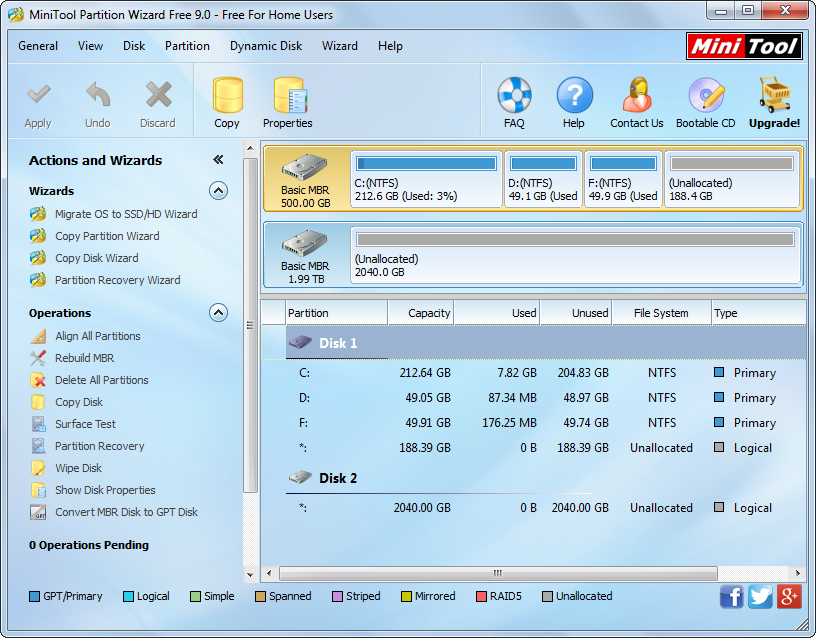
Firstly, launch the system migration freeware to get the main interface:
Then, choose “Migrate OS to SSD/HD Wizard” feature from the left side.
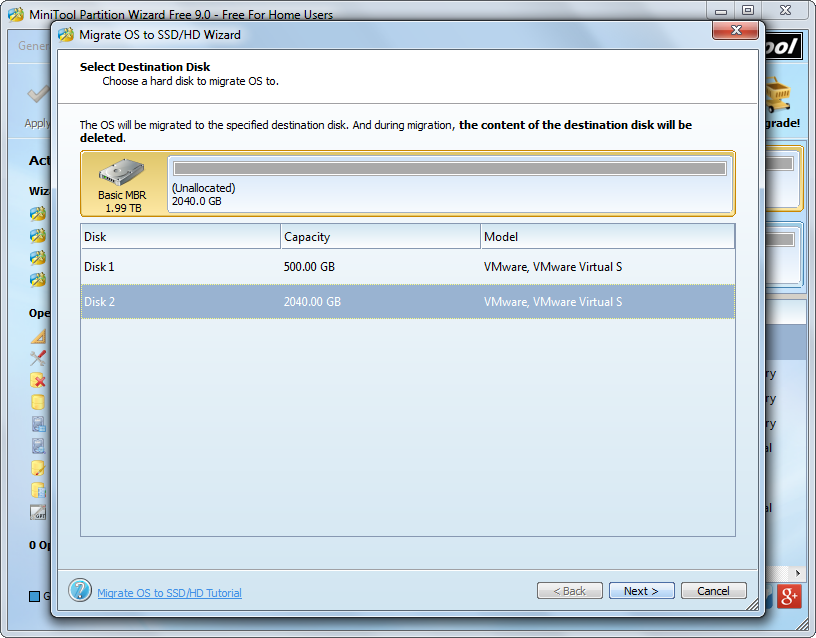
Next, select the larger hard drive to migrate Windows 7 to and click “Next>” to get the following window:
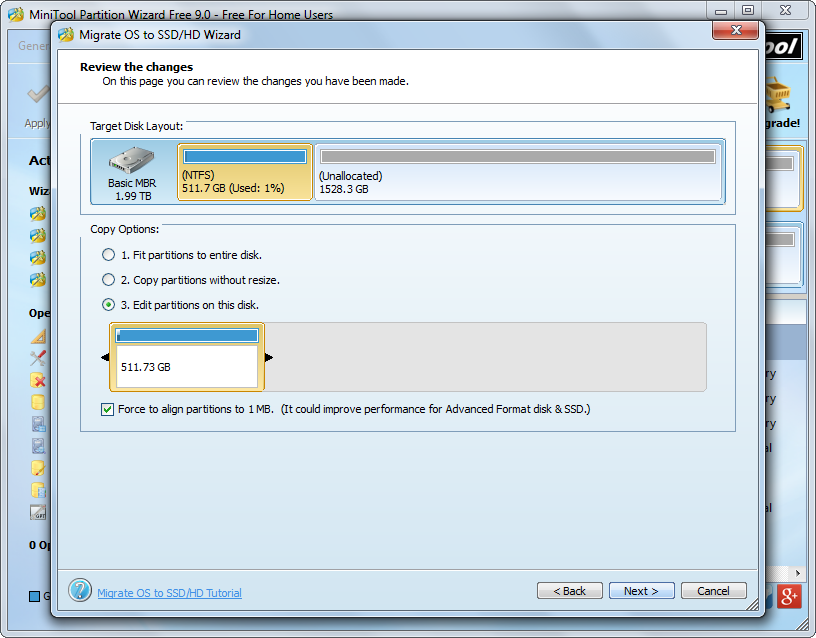
All partitions related to Windows startup will be cloned to the larger drive, and we can change the size and location for these partitions now. After getting desired size and location, click “Next>” to get a boot note:
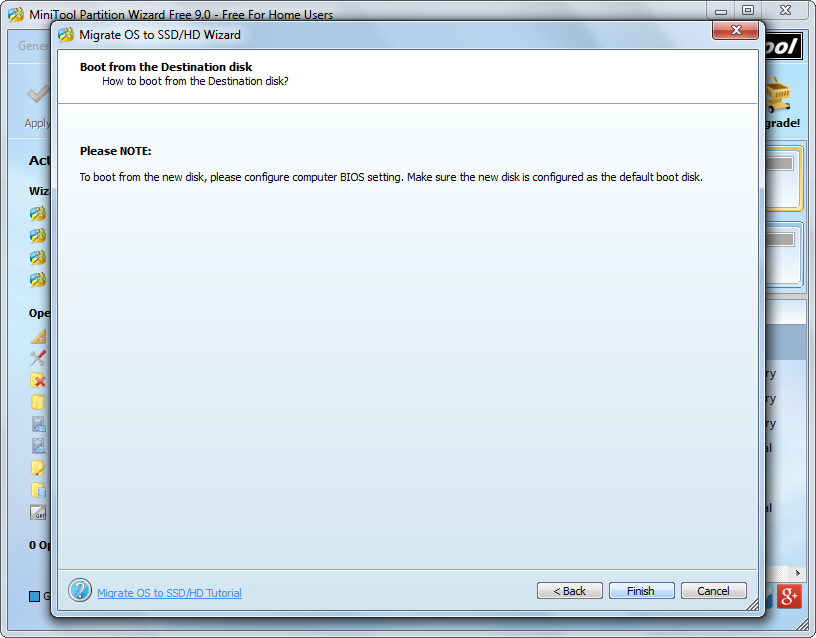
This note is very useful for users who are employing MBR + Legacy BIOS boot. Remember to set the larger hard drive as the default boot drive when rebooting computer. If you are using GPT + UEFI boot, just ignore the note and click “Finish”.

At last, click “Apply” button on the top to make all changes performed. Tip: since Windows 7 is running, we will be asked to reboot computer. Click “Start Now” and MiniTool Partition Wizard will make all changes in boot mode.
Now Windows 7 has been transferred to the larger hard drive. Actually, if the source disk has a lot of free space left, there is no need to migrate Windows 7, and you can extend the Windows partition by taking free space from other partitions or unallocated spaces on the same disk. For details, please see Extend Partition.